Chameleon
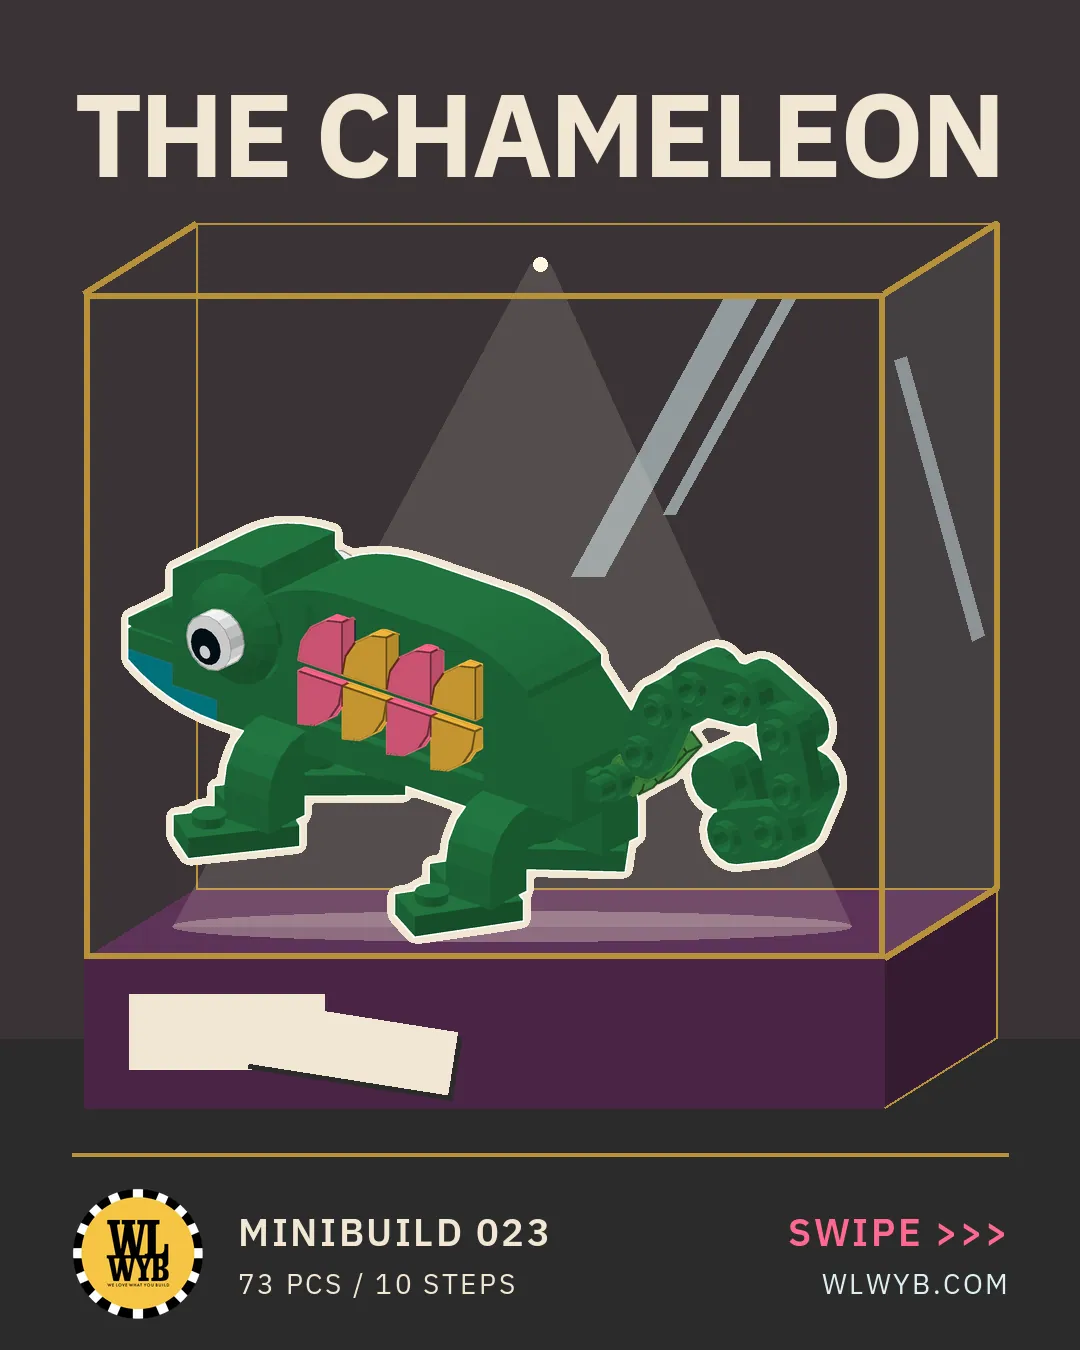
A small green chameleon built from LEGO® bricks, with a curled tail, coral and orange stripes and big eyes, in 10 steps and 73 pieces.
Free building instructions for small models built from LEGO® bricks.
Steps
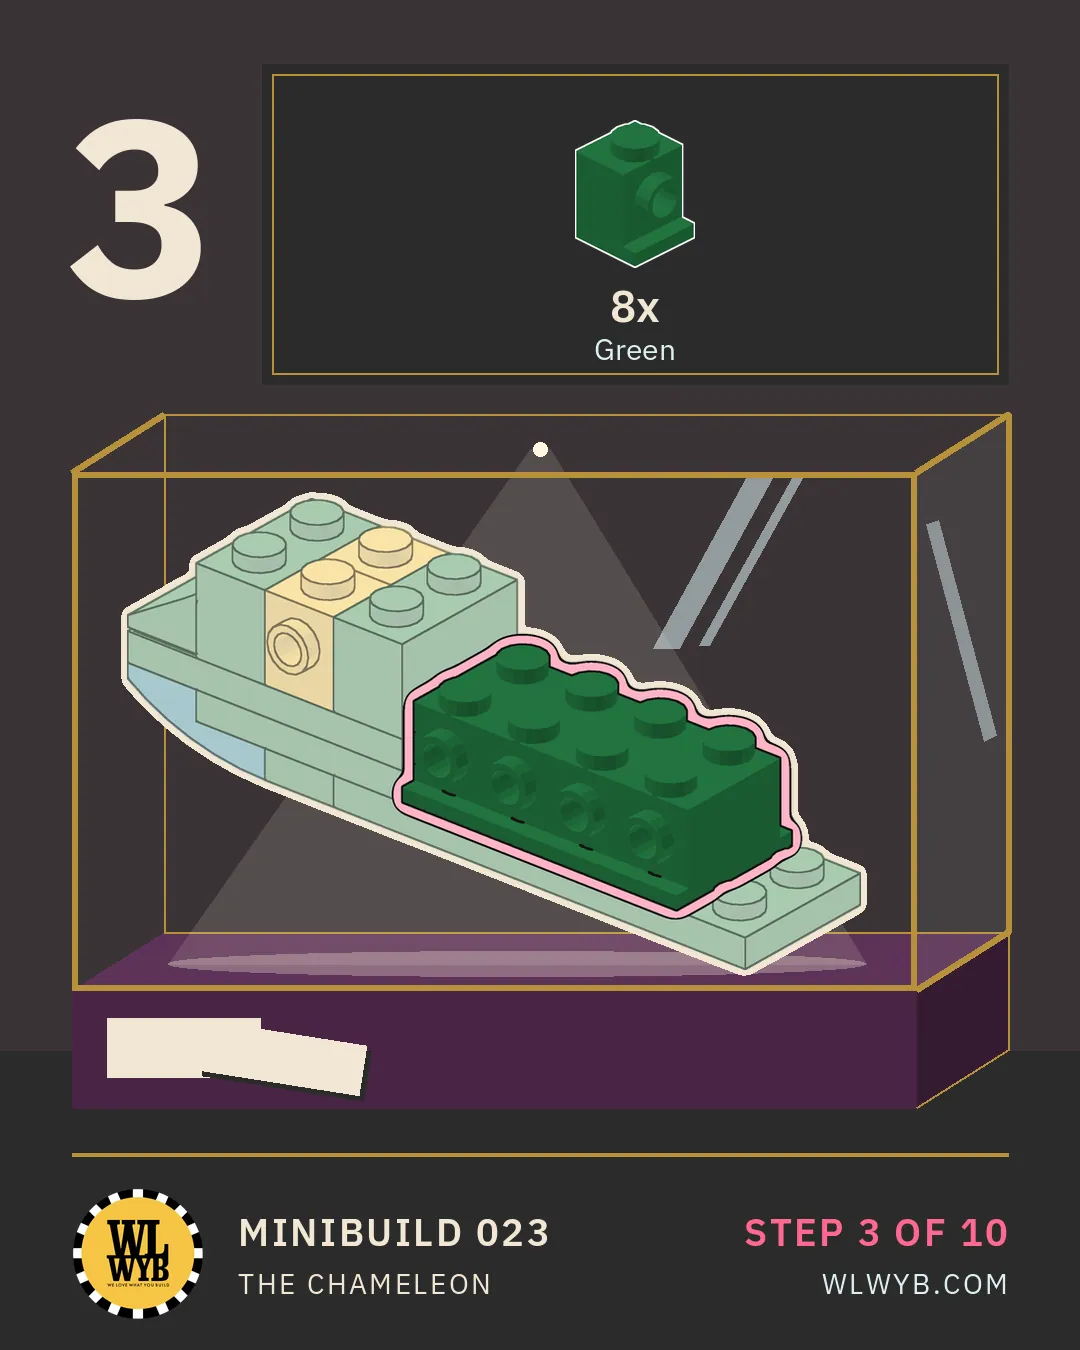
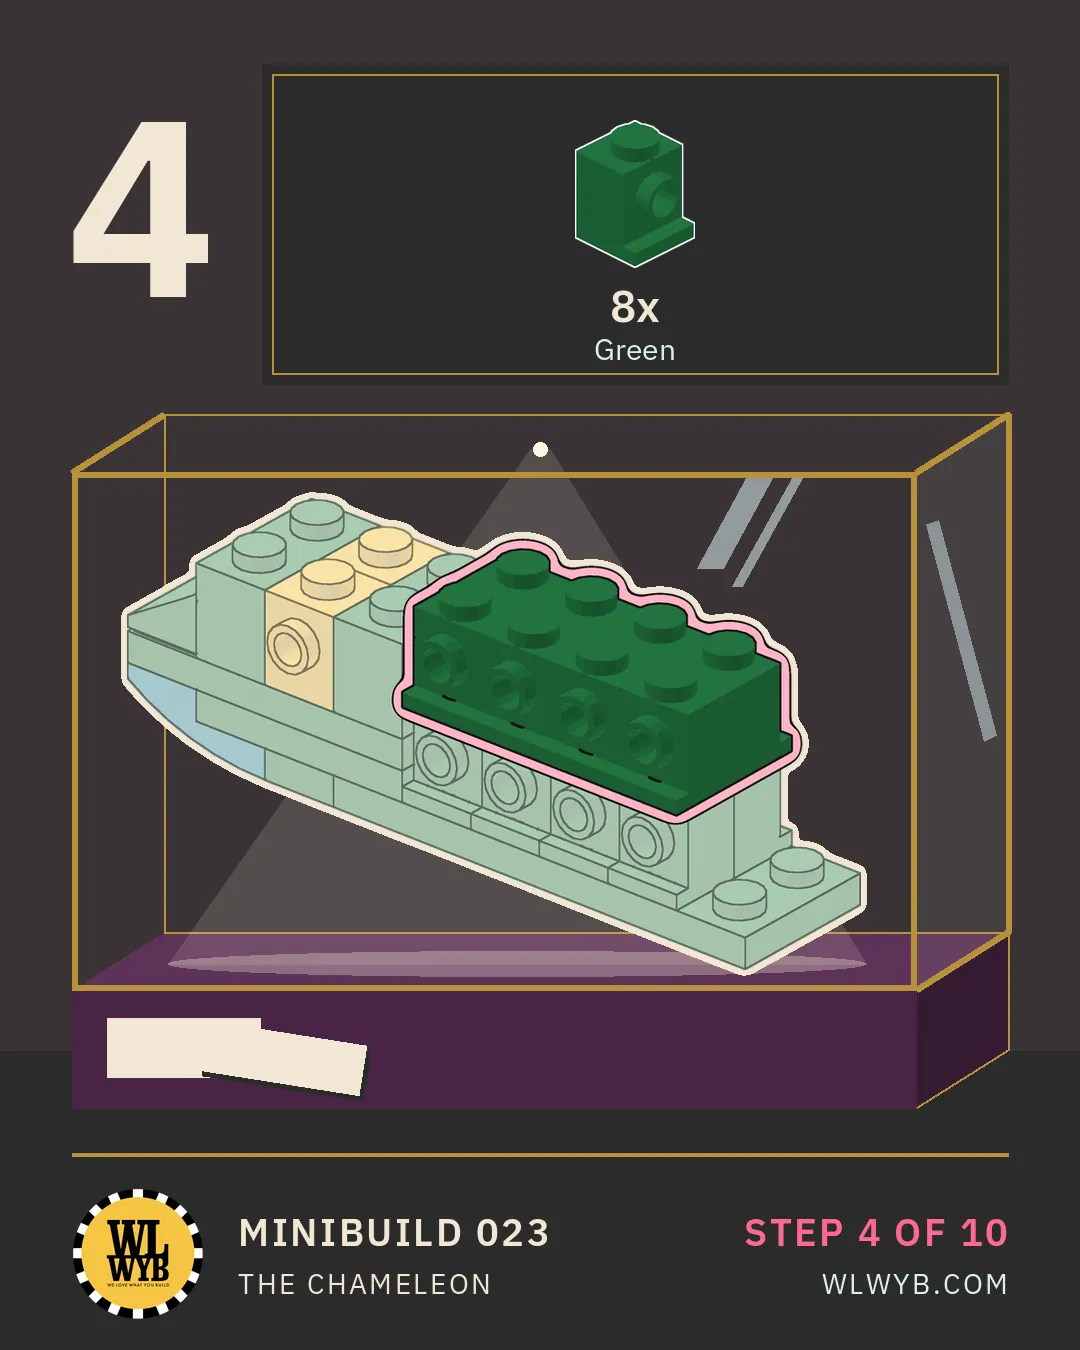
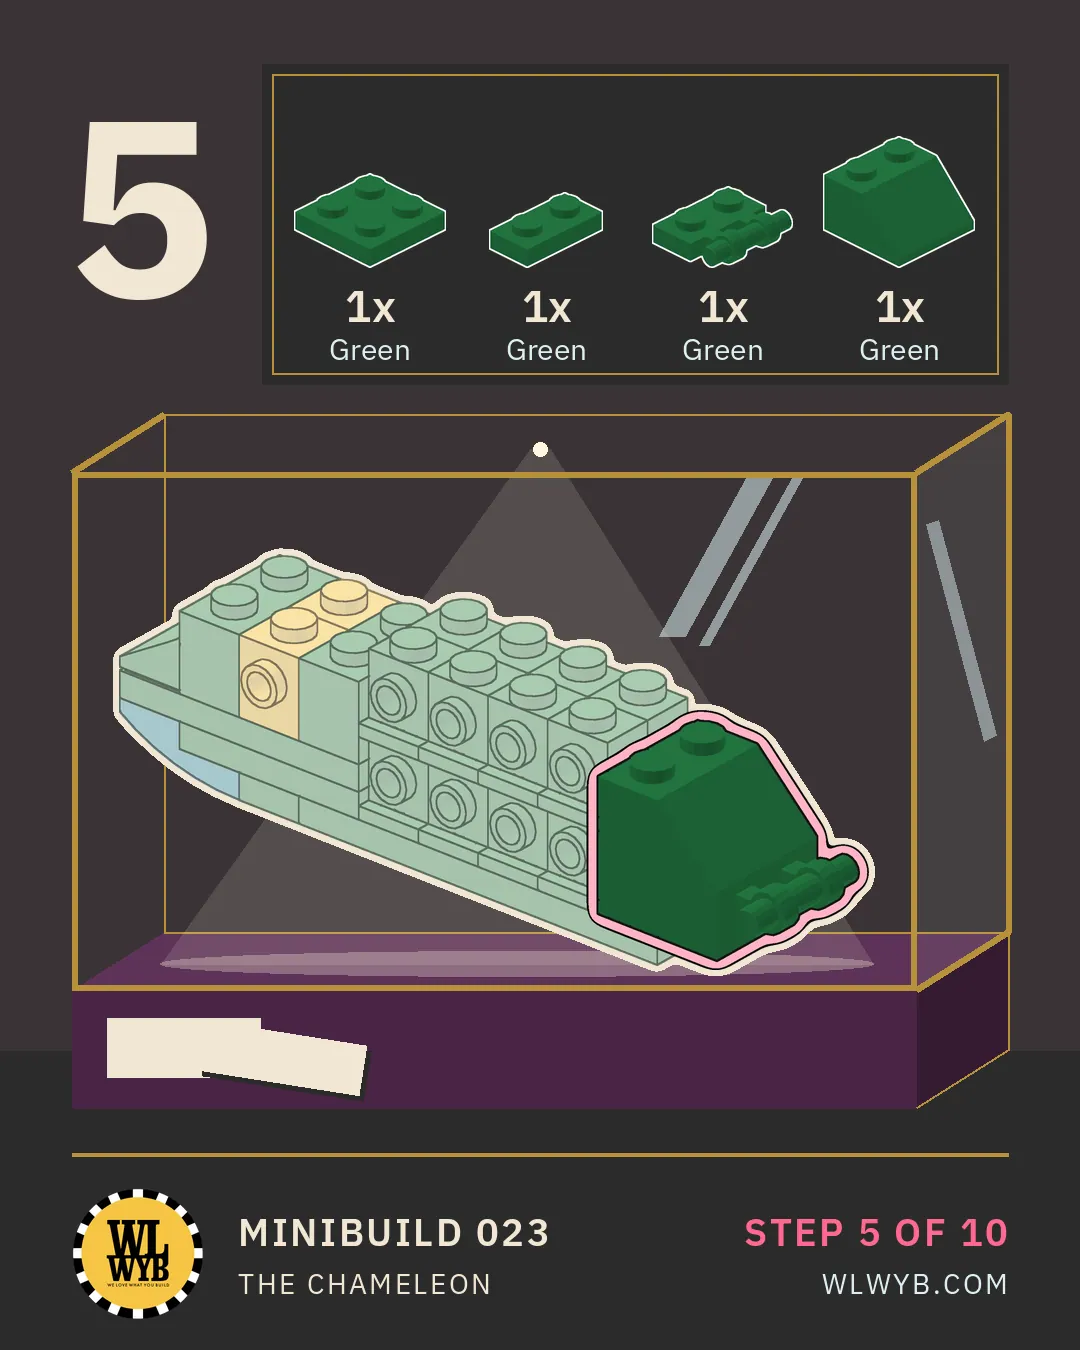
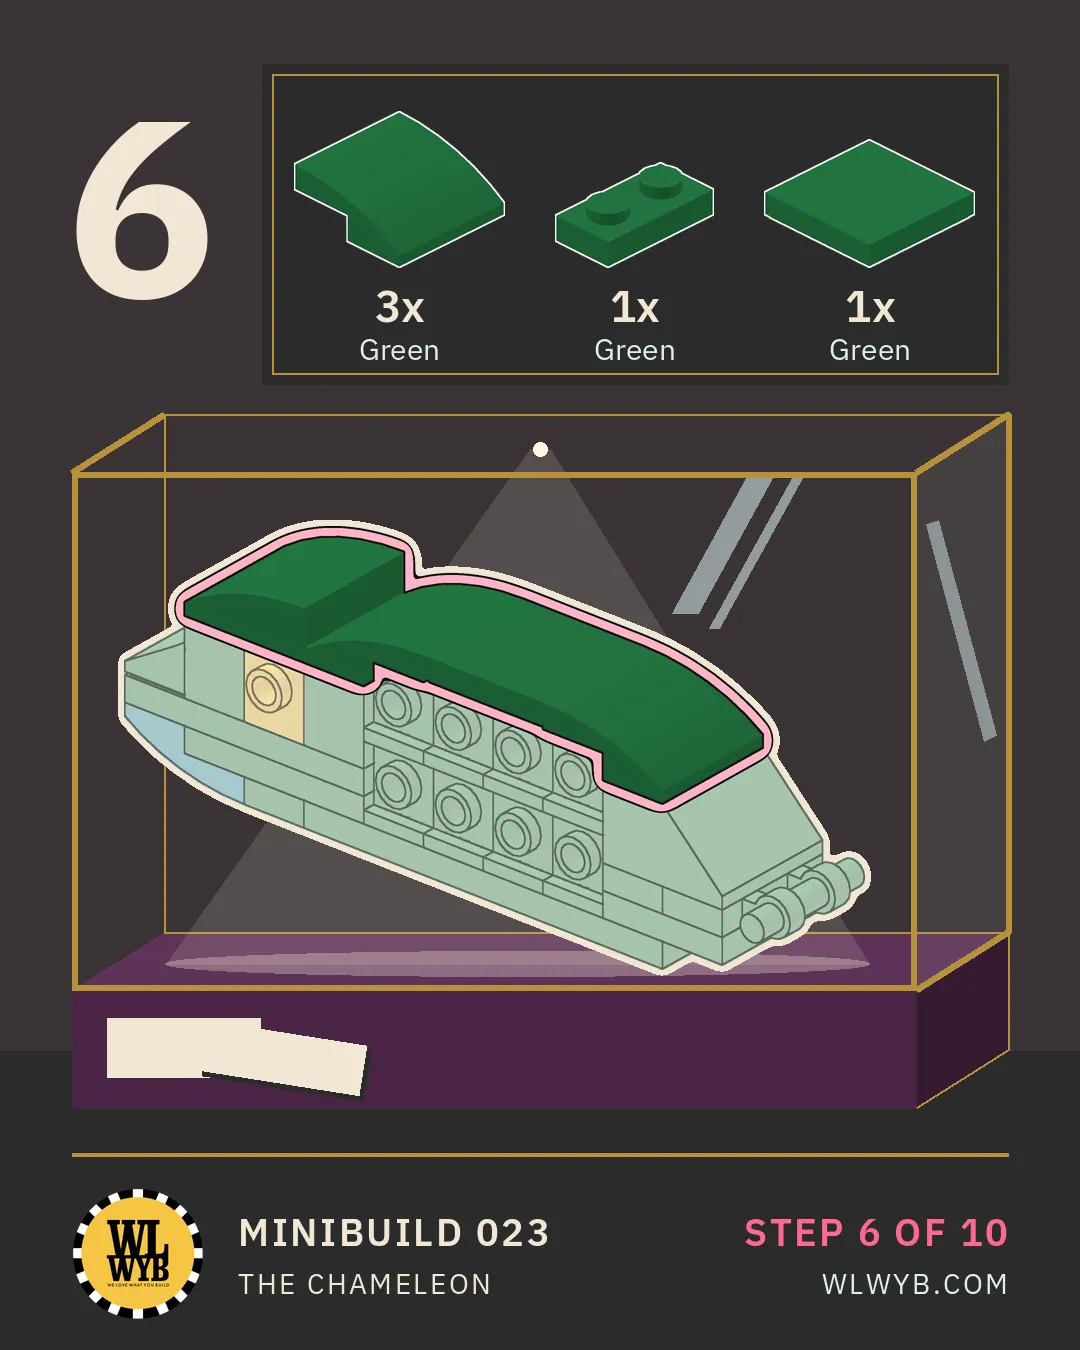
Parts and steps as text
Everything the slides show, in words.
The steps as text
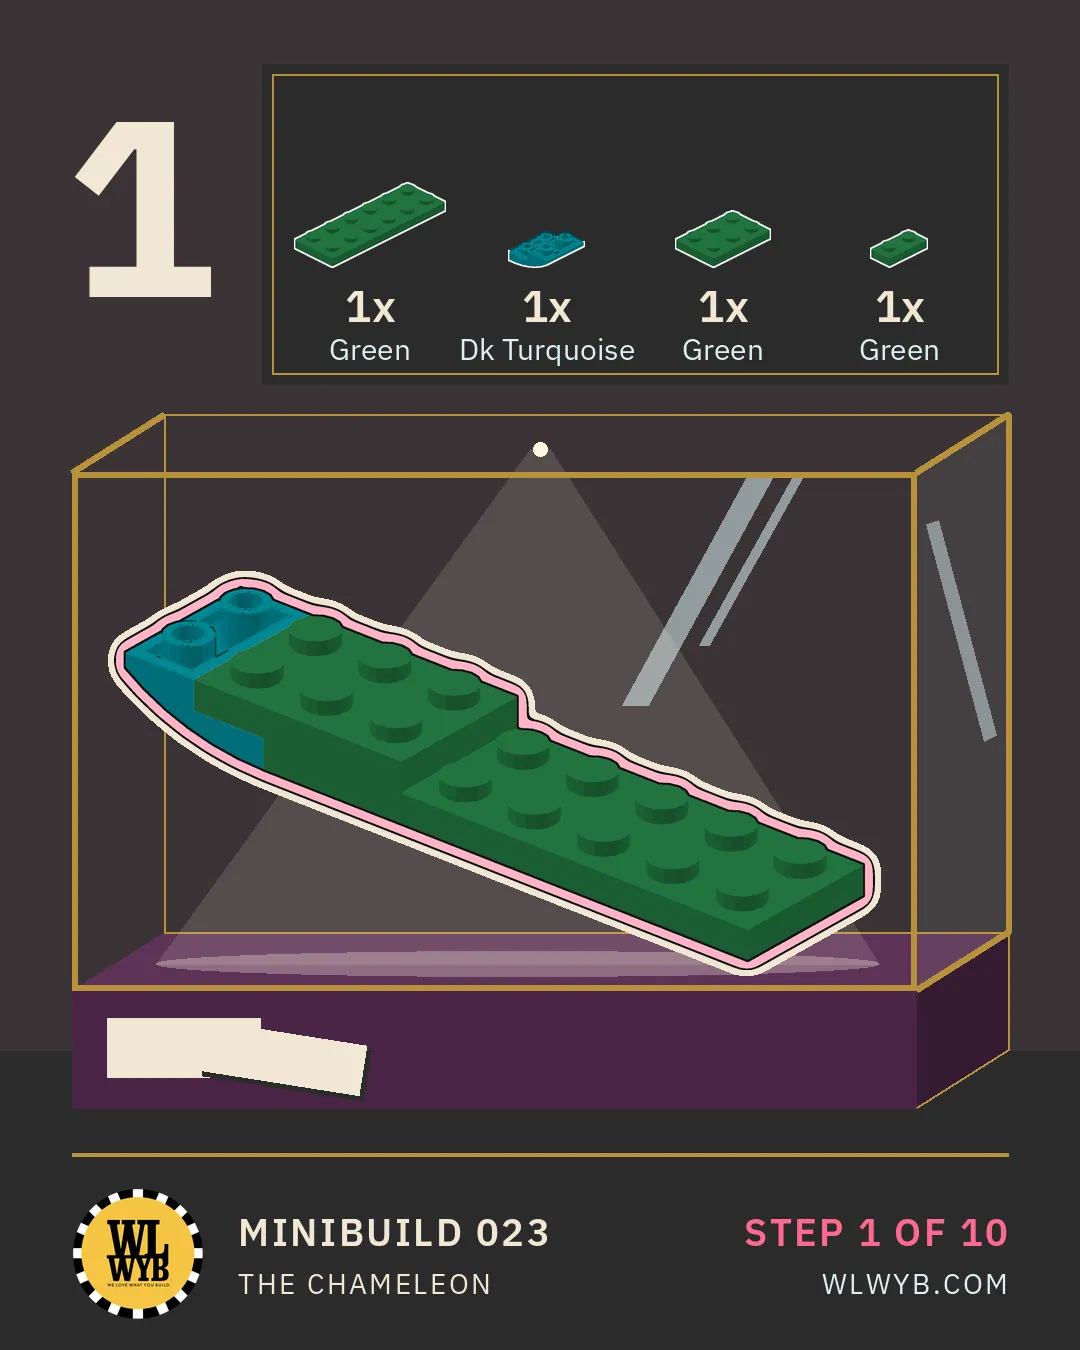
- Step 1 Start with a green 2 x 6 plate, a 2 x 3 plate, a 1 x 2 plate and the dark turquoise inverted curved slope. (4 parts)
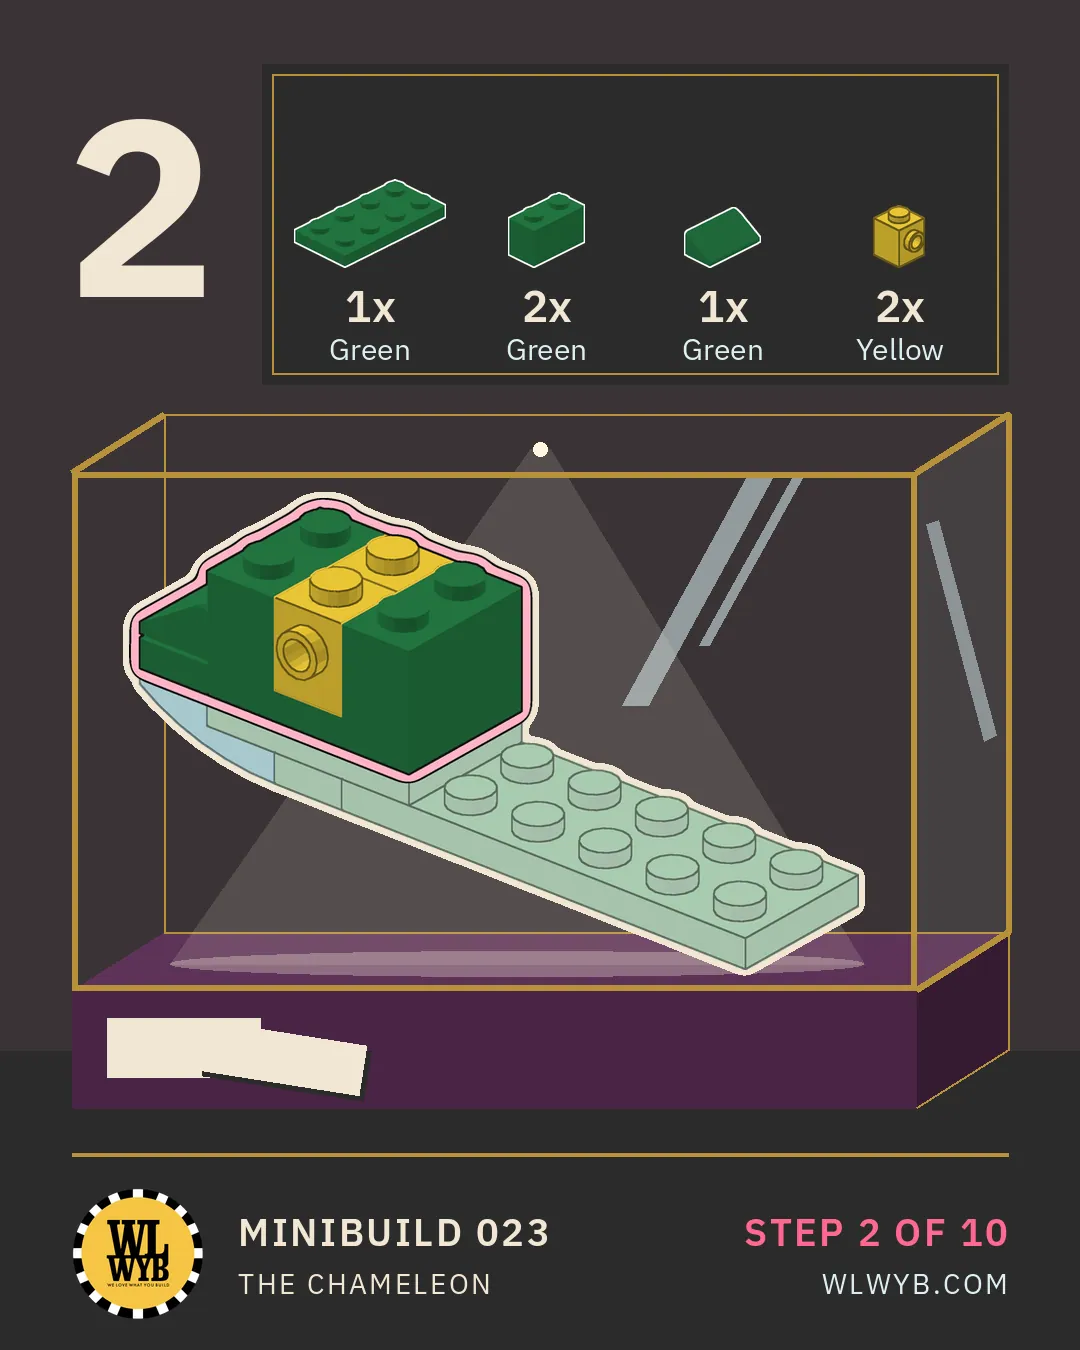
- Step 2 Add the 2 x 4 plate, two 1 x 2 bricks, a small slope and the two yellow bricks with a stud on the side. (6 parts)
- Step 3 Add a row of eight green headlight bricks. (8 parts)
- Step 4 Add eight more headlight bricks on top of them. (8 parts)
- Step 5 Build the back end with the plates, the slope and the plate with a bar handle for the tail. (4 parts)
- Step 6 Cover the back with three curved slopes, a 1 x 2 plate and a 2 x 2 tile. (5 parts)
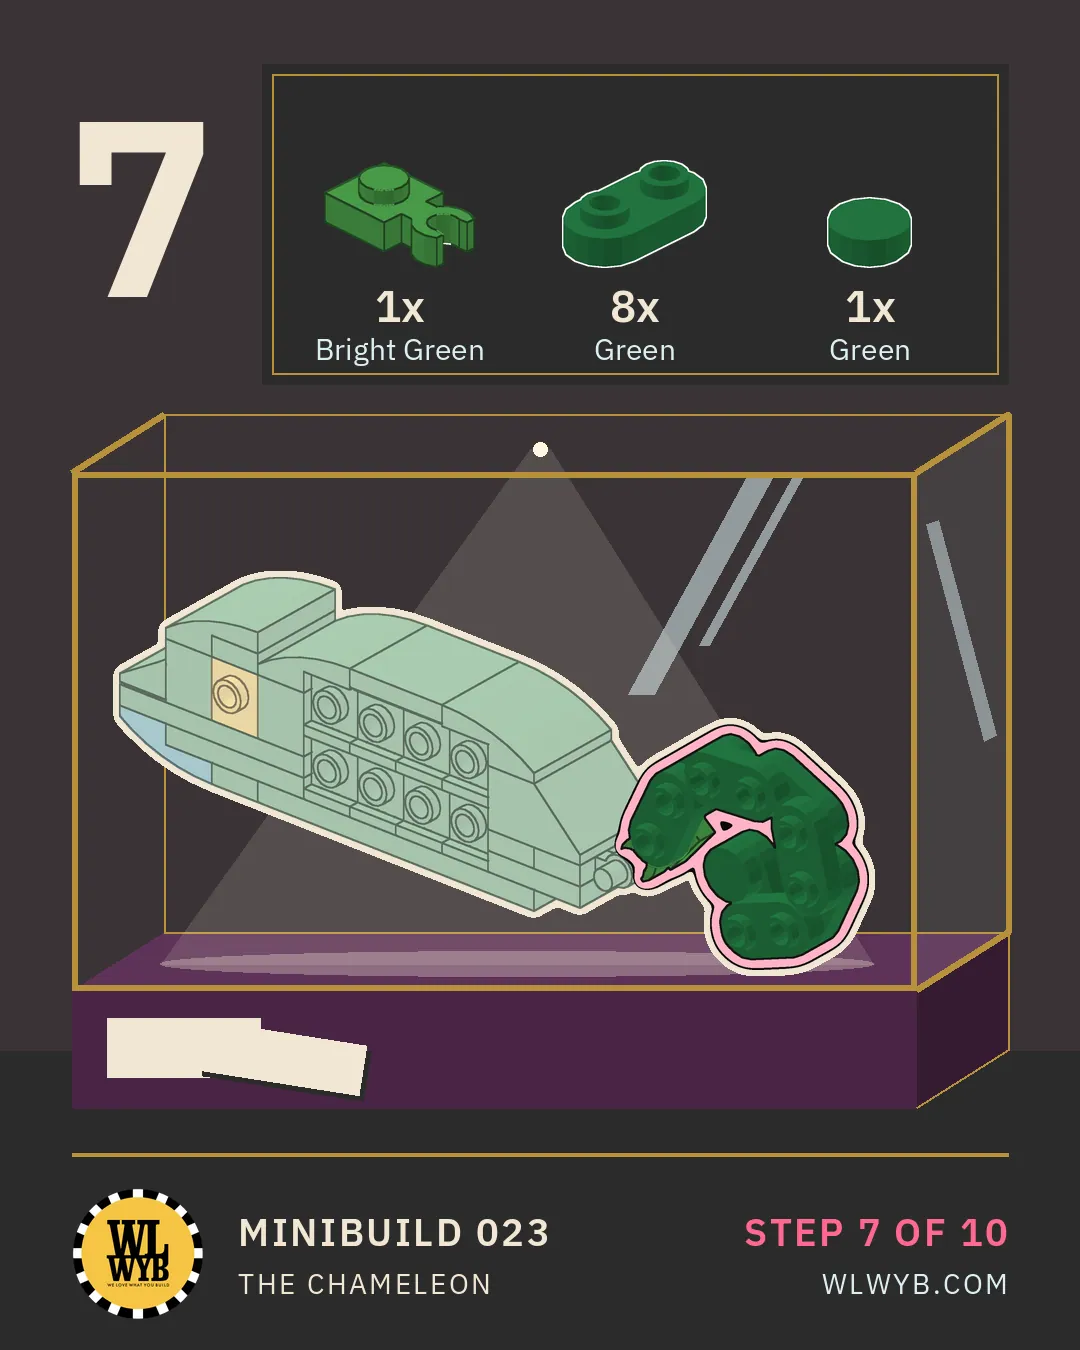
- Step 7 Build the curled tail from eight round 1 x 2 plates with open studs and clip it on. (10 parts)
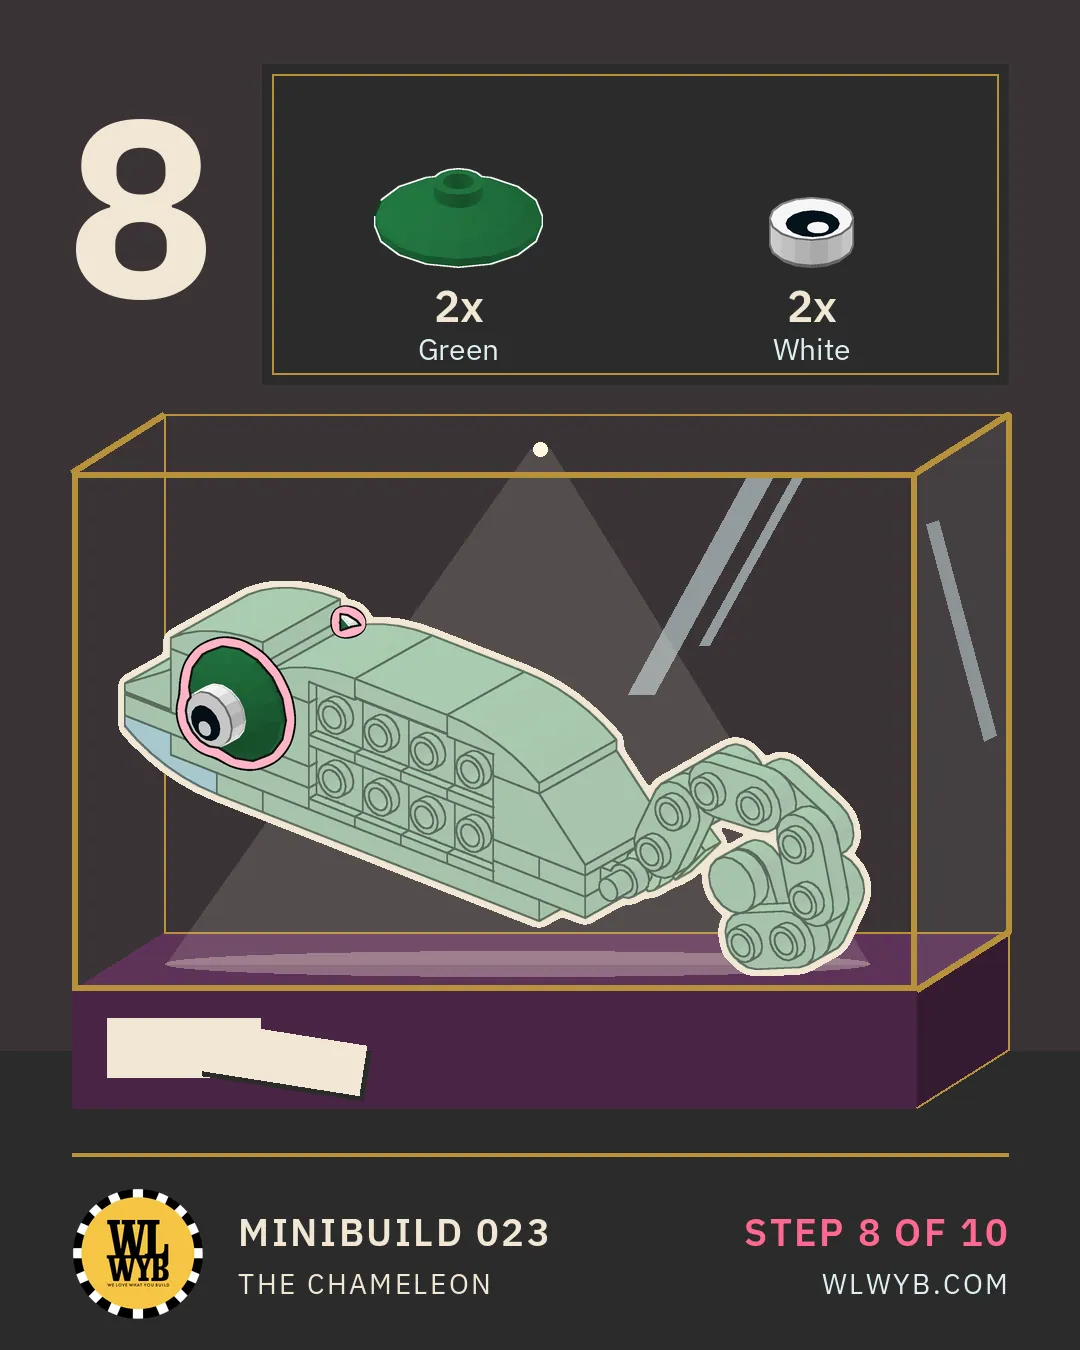
- Step 8 Add the two eyes and the two inverted dishes round them. (4 parts)
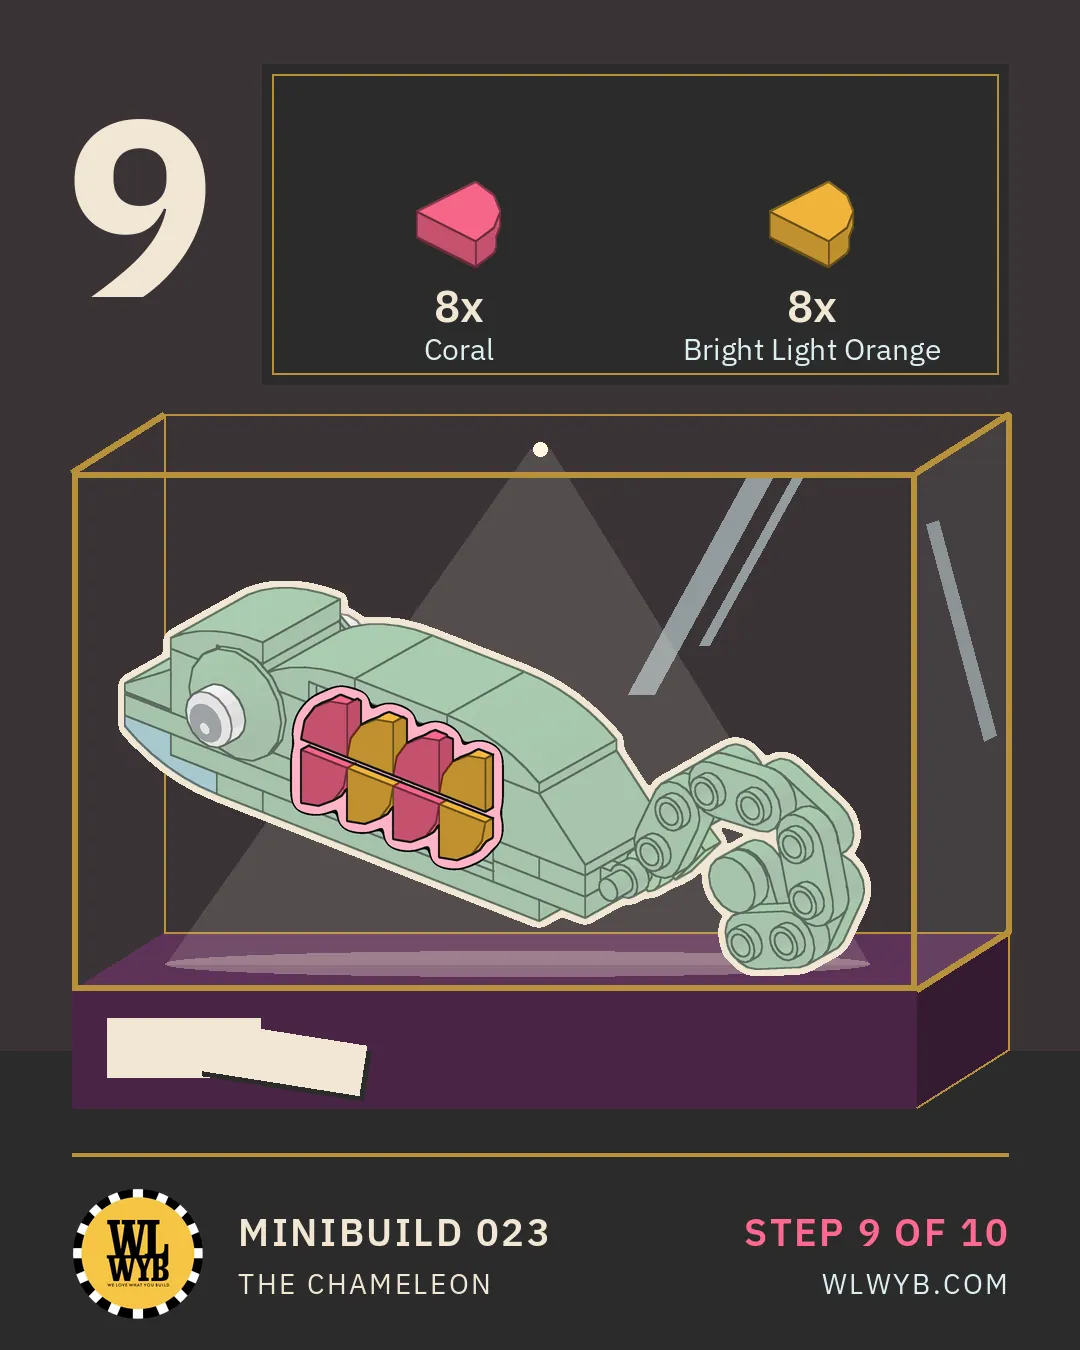
- Step 9 Fill both sides with quarter round tiles, coral and bright light orange in turns. (16 parts)
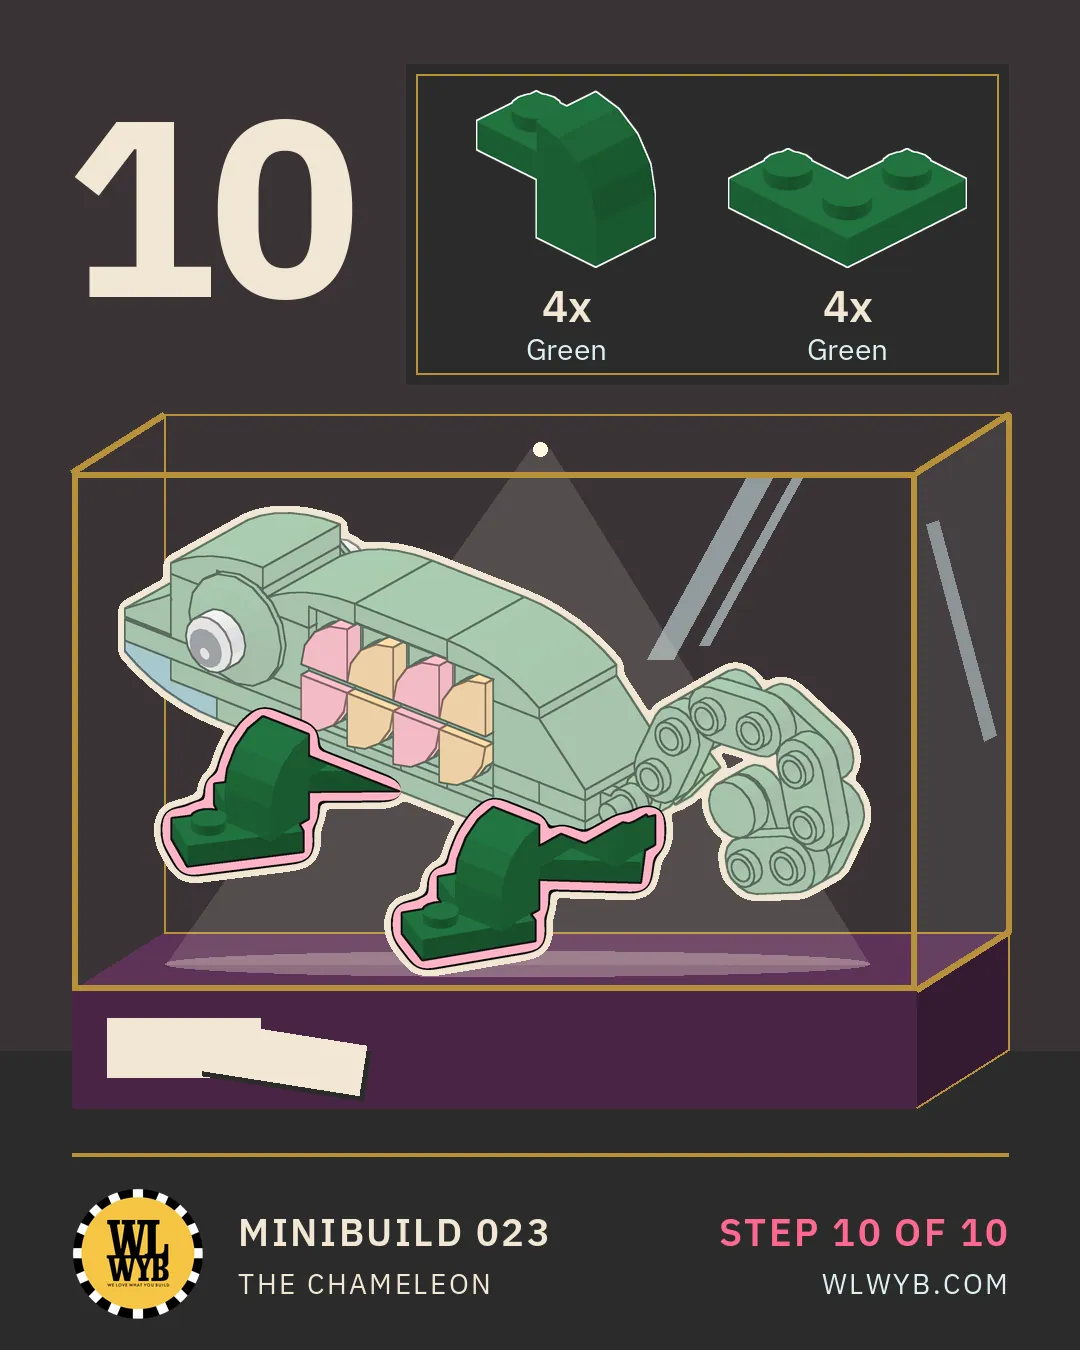
- Step 10 Add the four legs, each from a curved slope and a 2 x 2 corner plate. (8 parts)
The parts list, 73 pieces in total
- 3 x Slope, Curved 2 x 2 x 2/3, Green15068
- 4 x Plate 2 x 2 Corner, Green2420
- 1 x Plate, Modified 1 x 2 with Bar Handle on Side - Free Ends, Green2540
- 2 x Brick 1 x 2, Green3004
- 1 x Plate 2 x 4, Green3020
- 1 x Plate 2 x 3, Green3021
- 1 x Plate 2 x 2, Green3022
- 3 x Plate 1 x 2, Green3023
- 1 x Slope 45 2 x 2, Green3039
- 1 x Tile 2 x 2, Green3068
- 8 x Plate, Round 1 x 2 with Open Studs, Green35480
- 1 x Plate 2 x 6, Green3795
- 16 x Brick, Modified 1 x 1 with Headlight, Green4070
- 2 x Dish 2 x 2 Inverted (Radar), Green4740
- 4 x Slope, Curved 2 x 1 x 1 1/3 with Recessed Stud, Green6091
- 1 x Slope 30 1 x 2 x 2/3, Green85984
- 1 x Tile, Round 1 x 1, Green98138
- 1 x Plate, Modified 1 x 1 with Open O Clip Thick (Vertical Grip), Bright Green4085d
- 8 x Tile, Round 1 x 1 Quarter, Bright Light Orange25269
- 8 x Tile, Round 1 x 1 Quarter, Coral25269
- 1 x Slope, Curved 2 x 2 x 2/3 Inverted, Dark Turquoise32803
- 2 x Tile, Round 1 x 1 with Black Eye with Pupil Pattern, White98138pb007
- 2 x Brick, Modified 1 x 1 with Stud on Side, Yellow87087
Where to go next
Want a ready-made model? Open Editions has them to order online, with your print on them if you want it. From 20 kits, shipped within 6 weeks.
Want something designed from scratch? Custom Models.