Wild boar
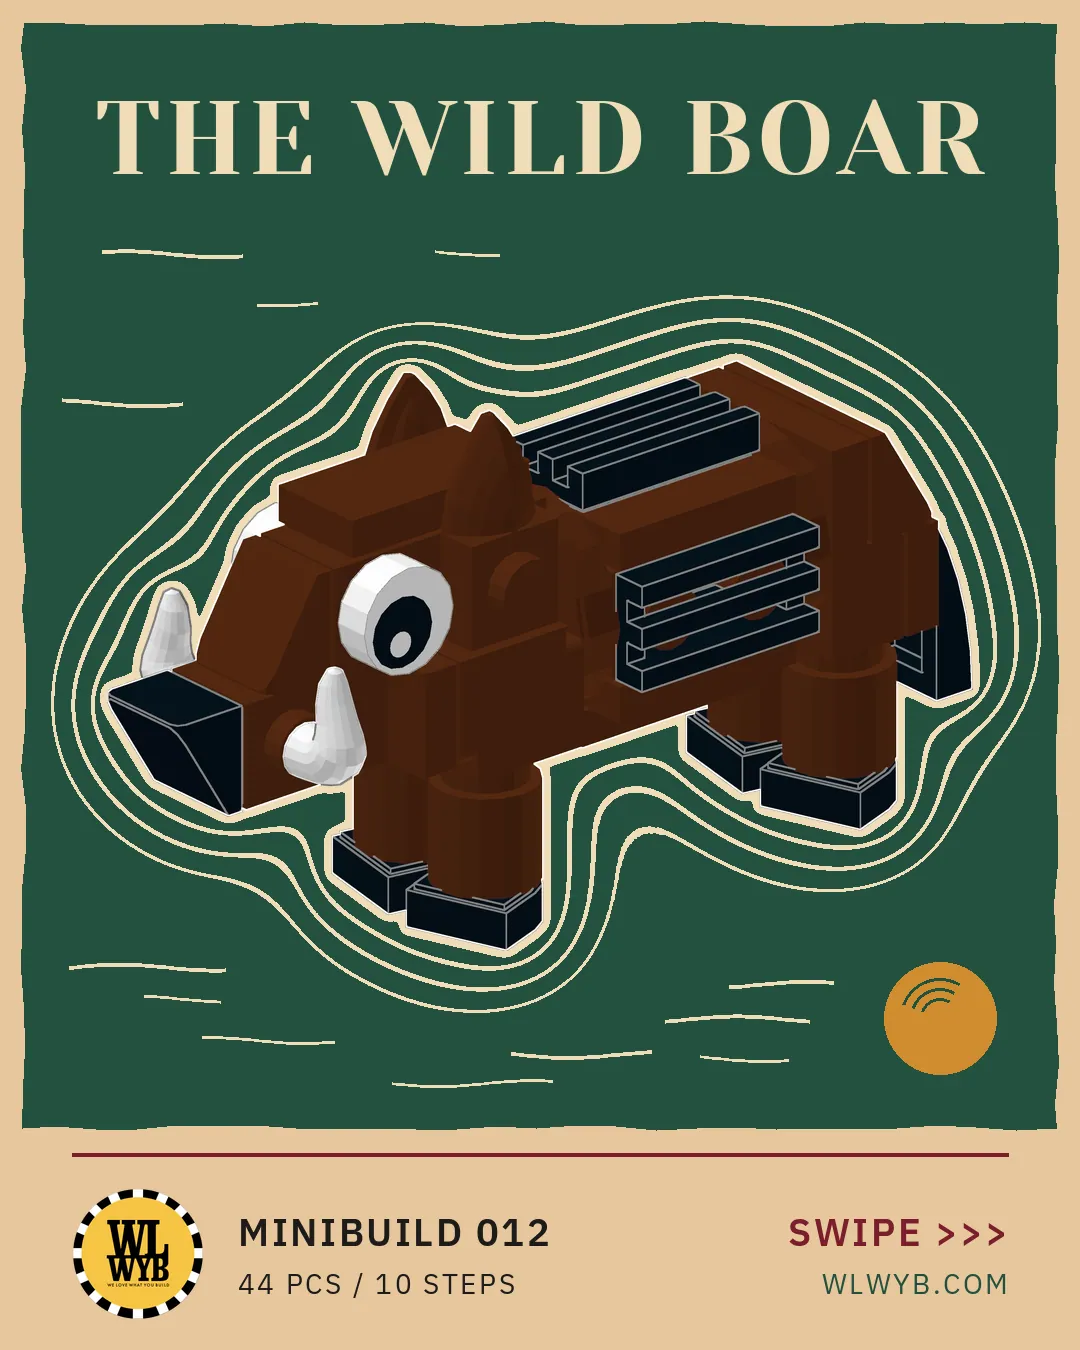
A small wild boar built from LEGO® bricks, with white tusks, a black snout and grille tiles for bristles, in 10 steps and 44 pieces.
Free building instructions for small models built from LEGO® bricks.
Steps
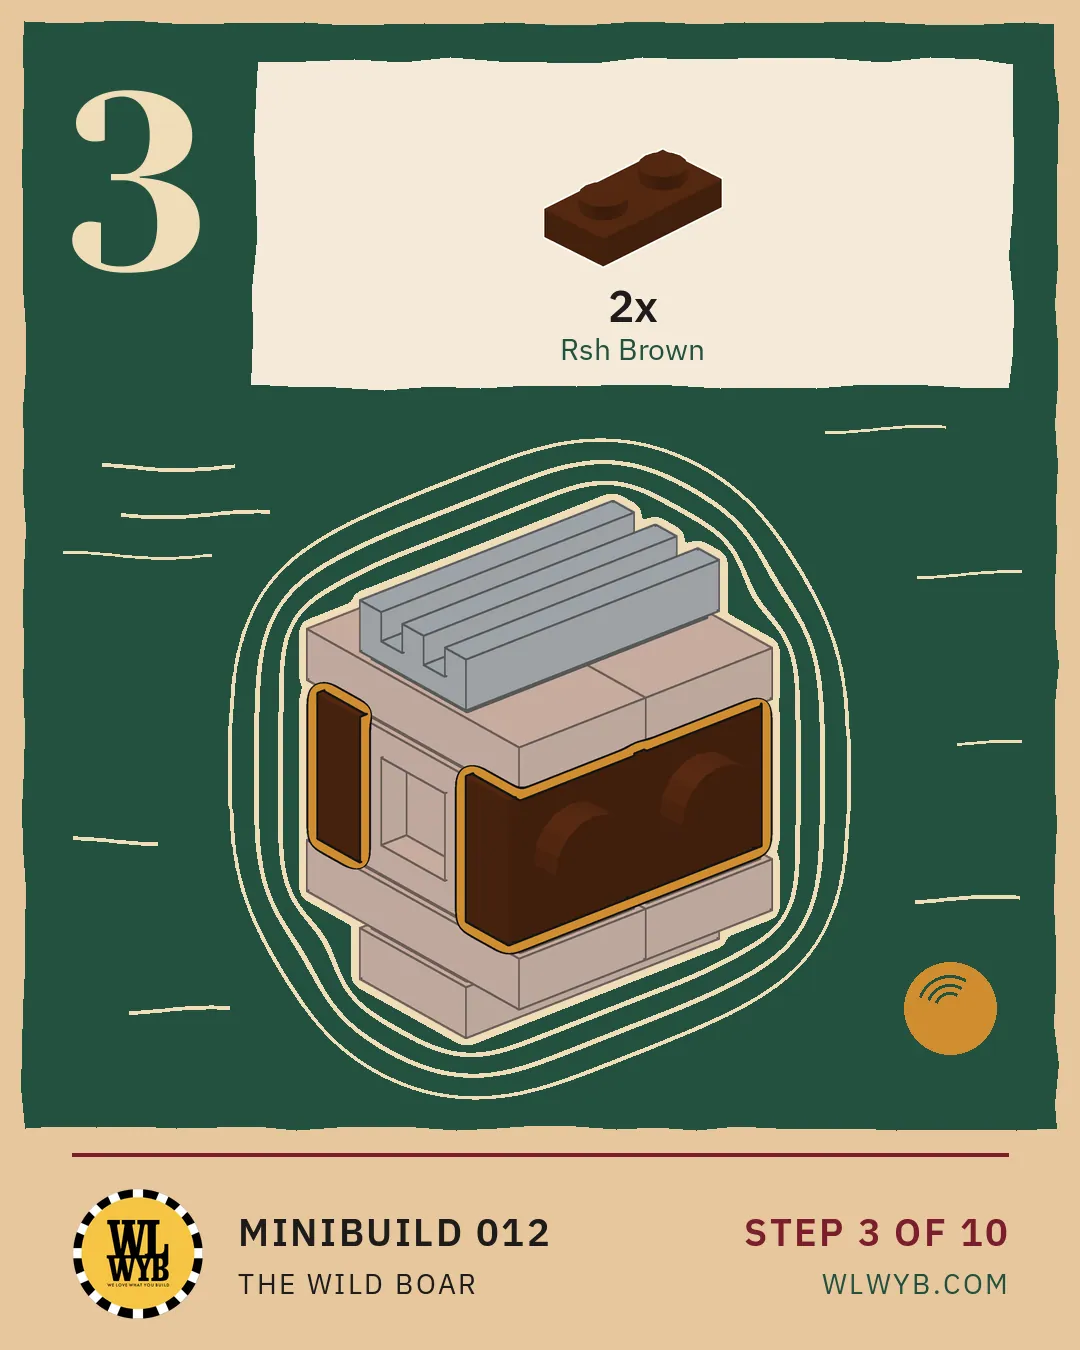
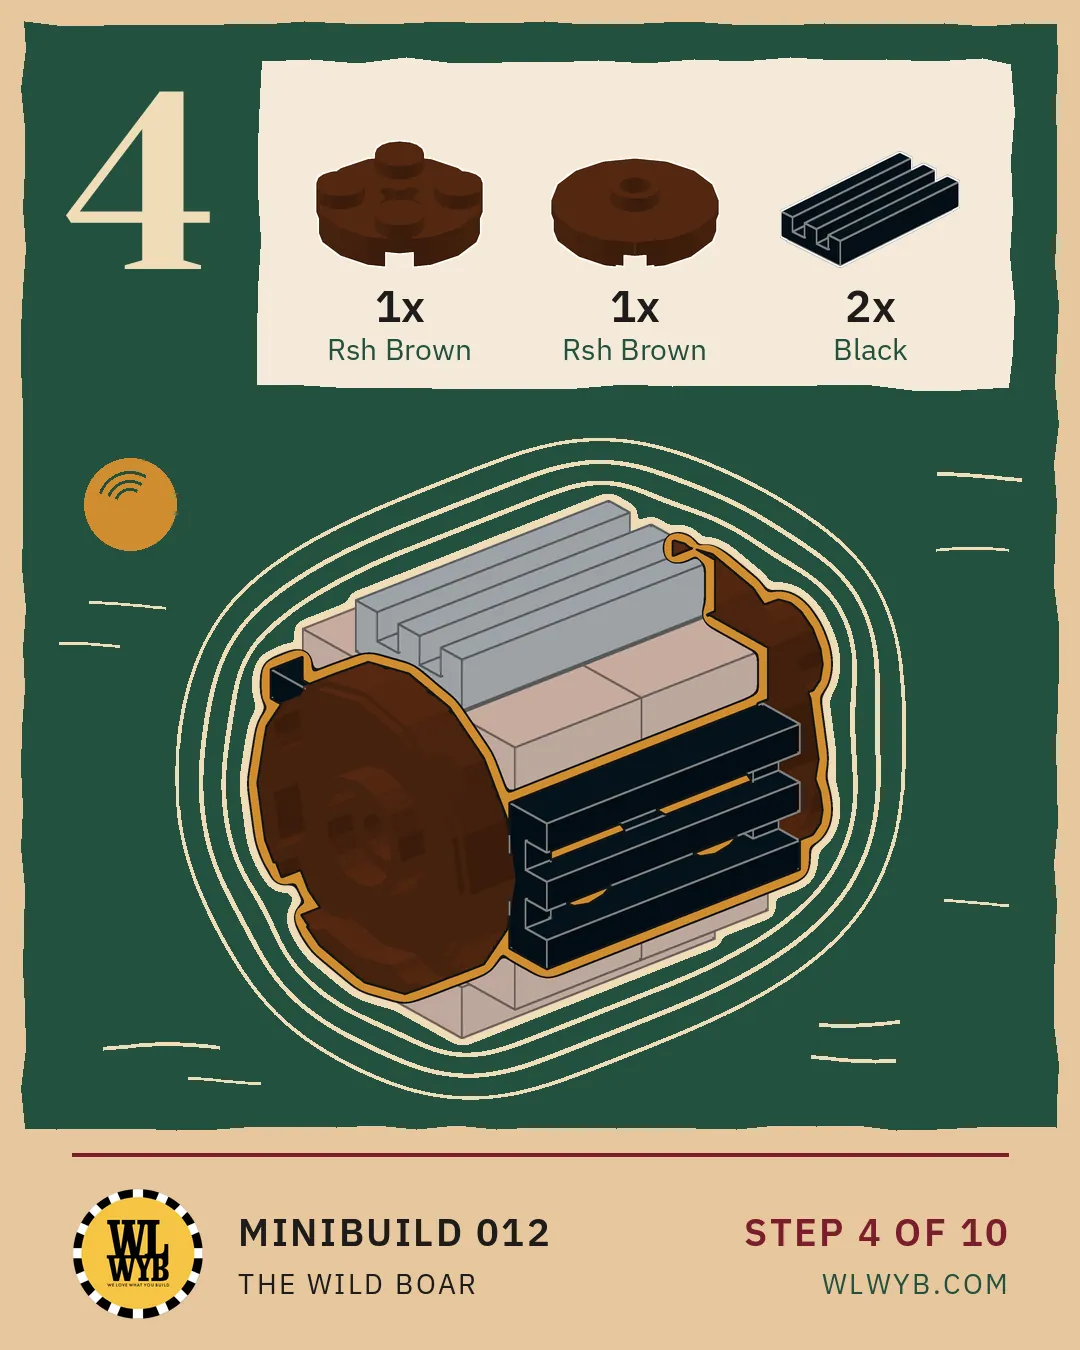
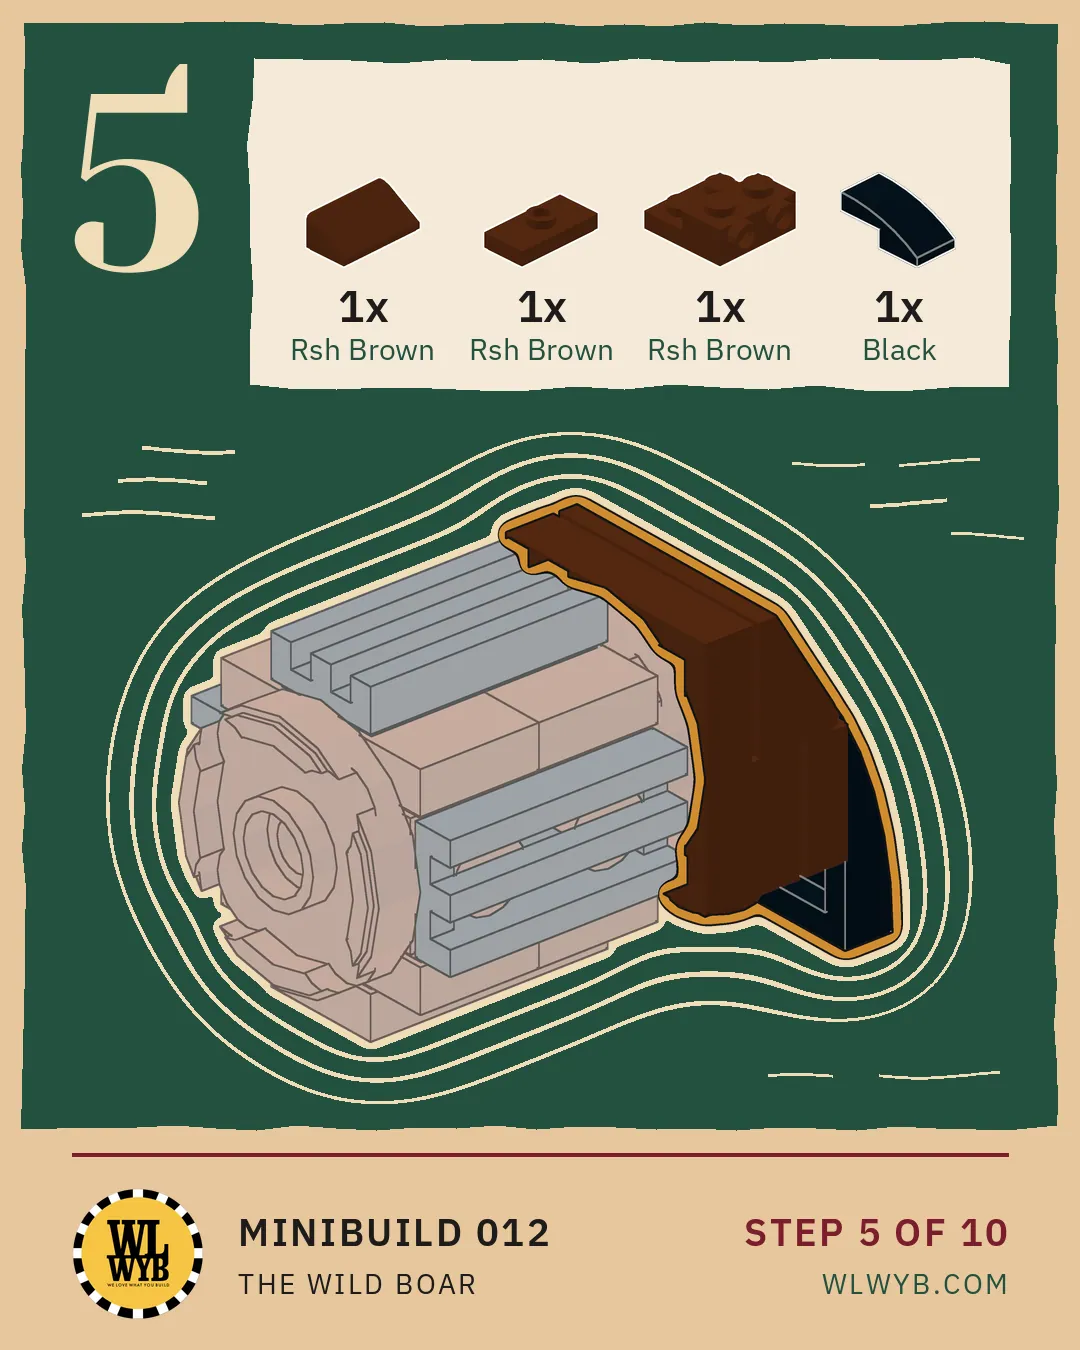
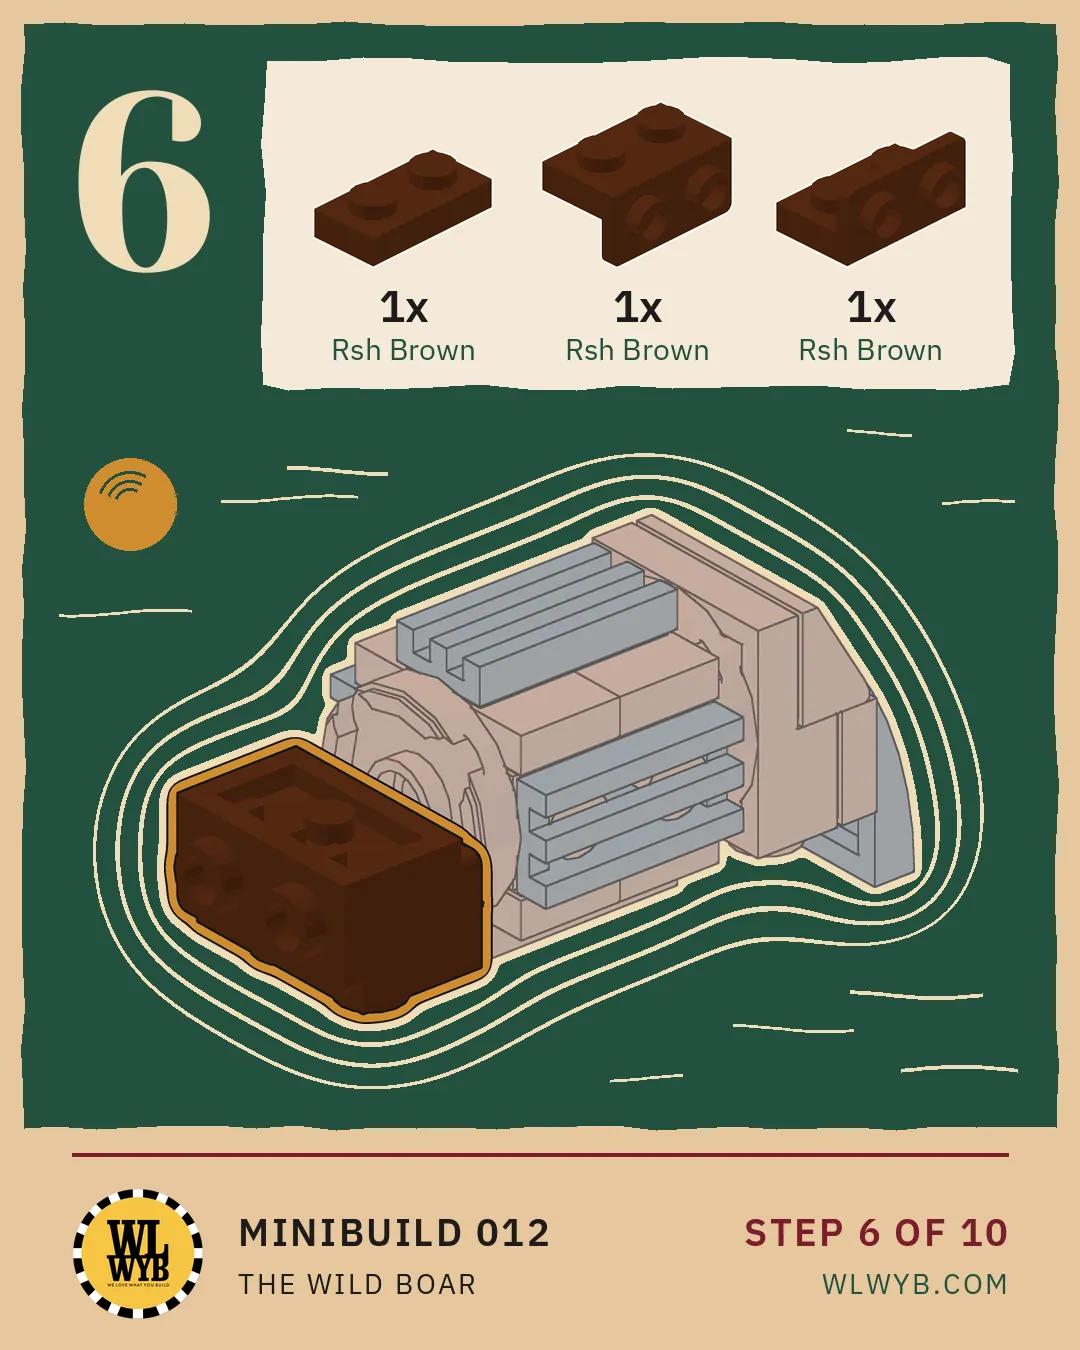
Parts and steps as text
Everything the slides show, in words.
The steps as text
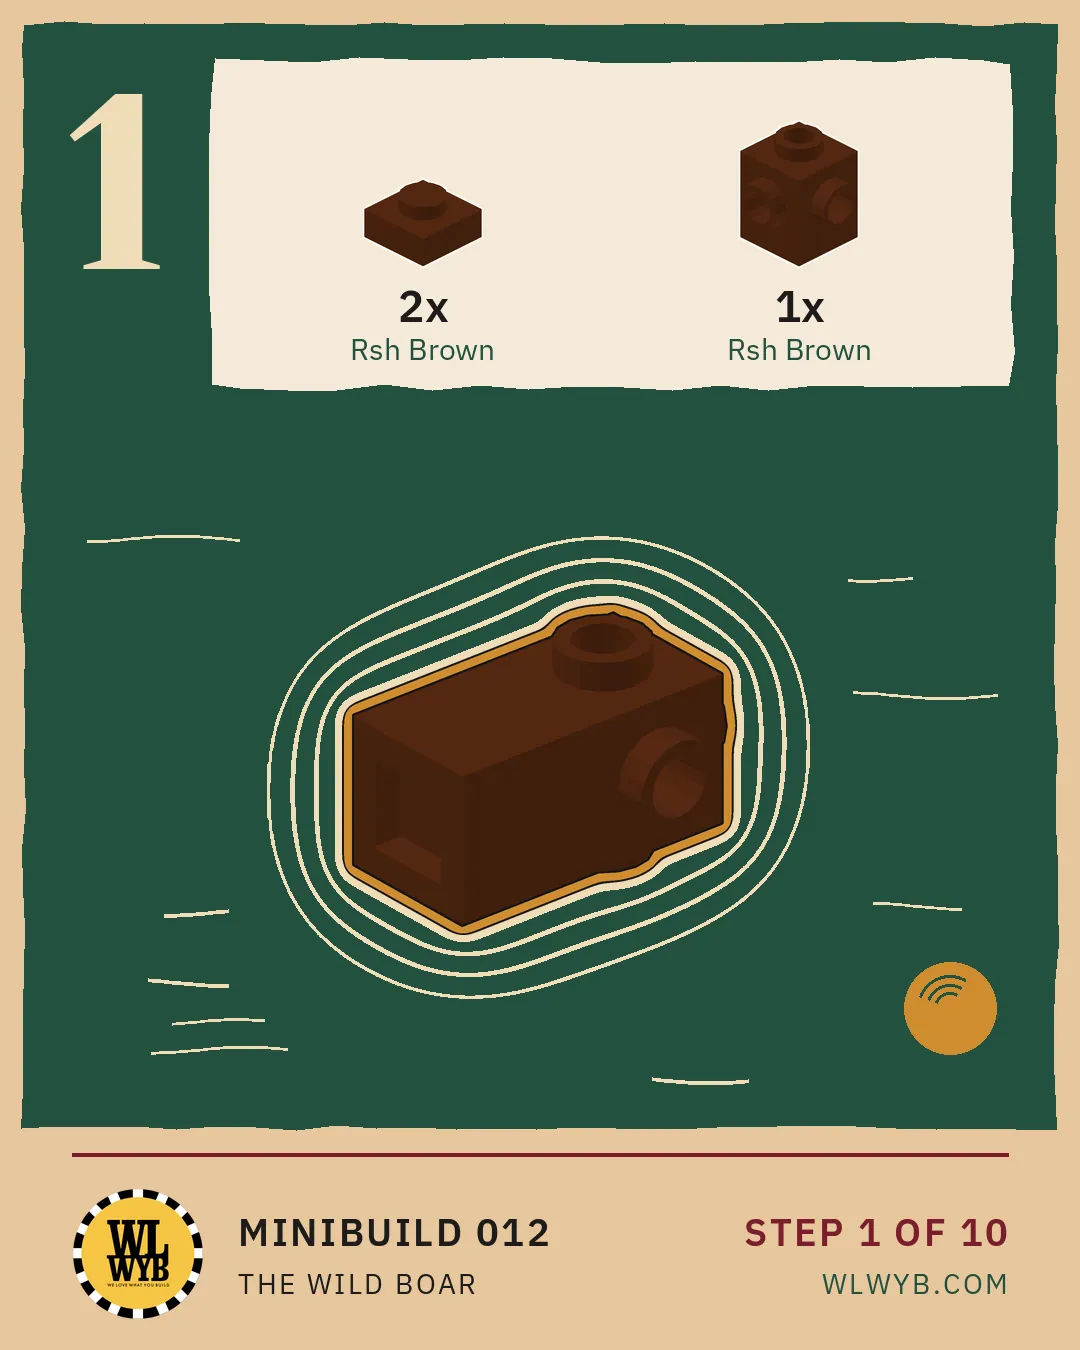
- Step 1 Start the body with a brick with studs on four sides and two 1 x 1 plates. (3 parts)
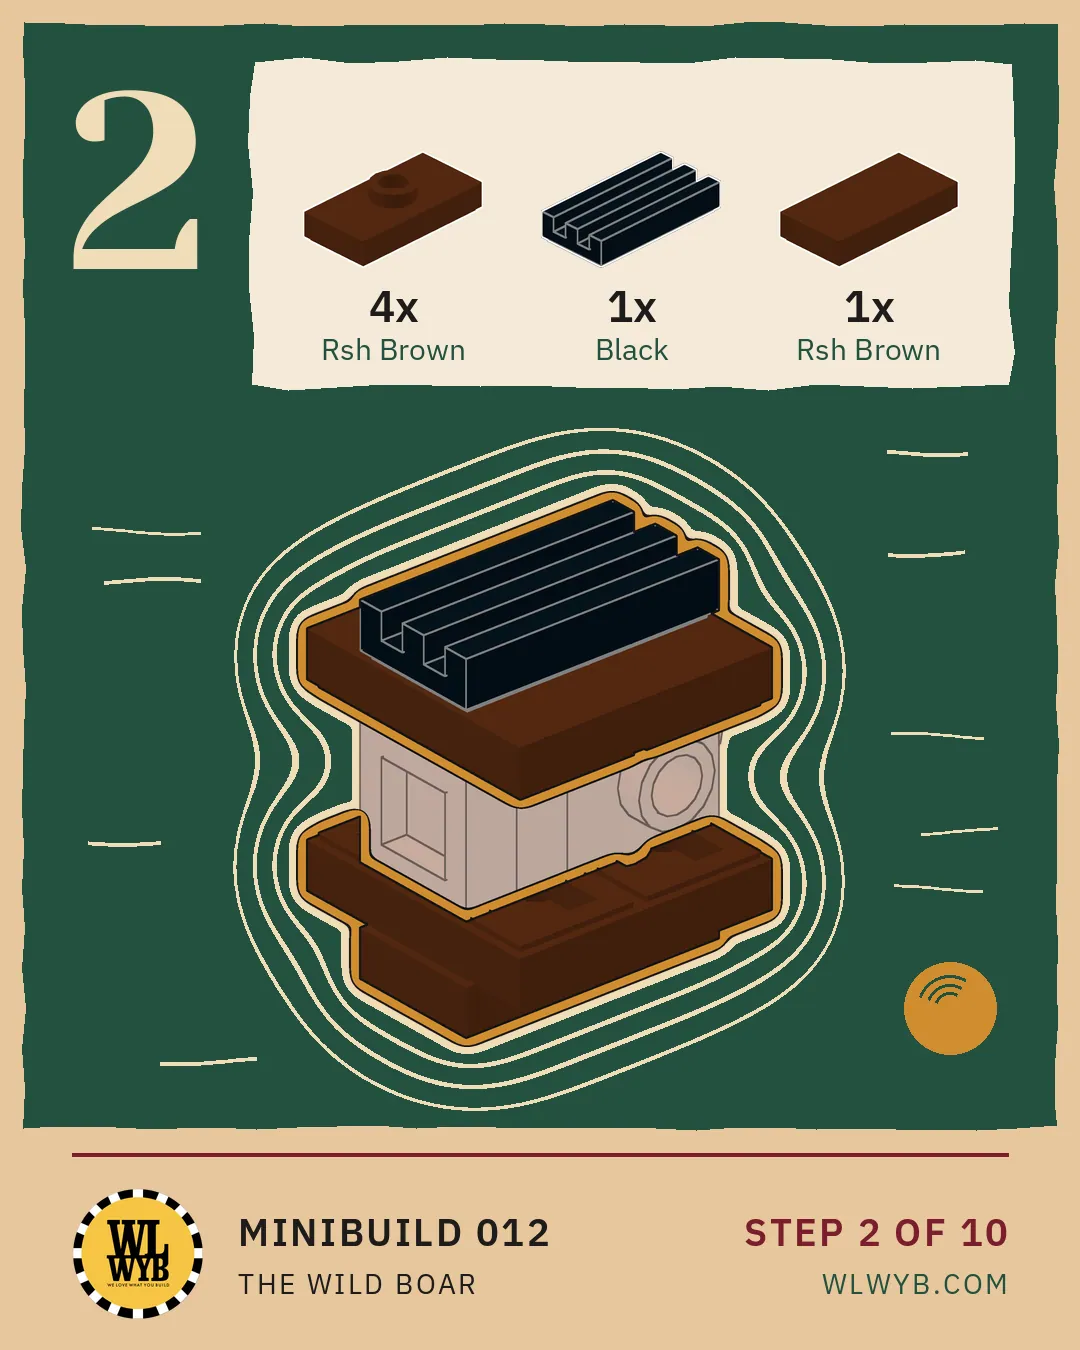
- Step 2 Add the jumper plates above and below, a black grille tile and a 1 x 2 tile. (6 parts)
- Step 3 Add a 1 x 2 plate on each side. (2 parts)
- Step 4 Add the round plate and the round tile at the front, where the head goes, and the grille tiles on the side. (4 parts)
- Step 5 Add the back end with the black curved slope, a slope and the plate with studs on the side. (4 parts)
- Step 6 Start the head with a 1 x 2 plate and the two brackets. (3 parts)
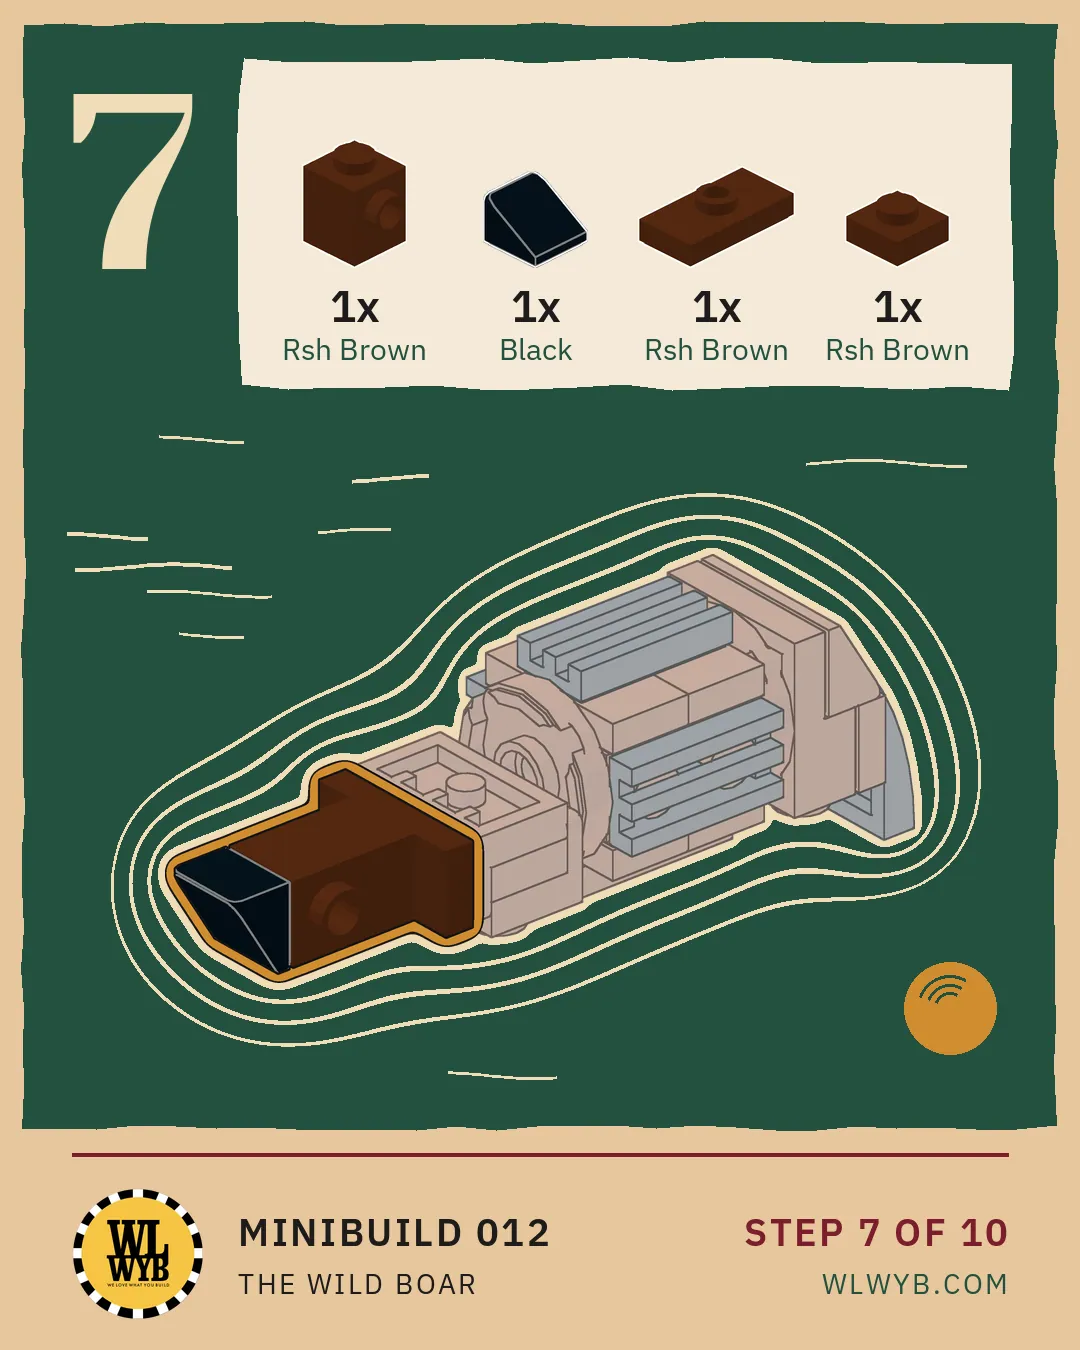
- Step 7 Add the black snout slope and the parts at the front of the head. (4 parts)
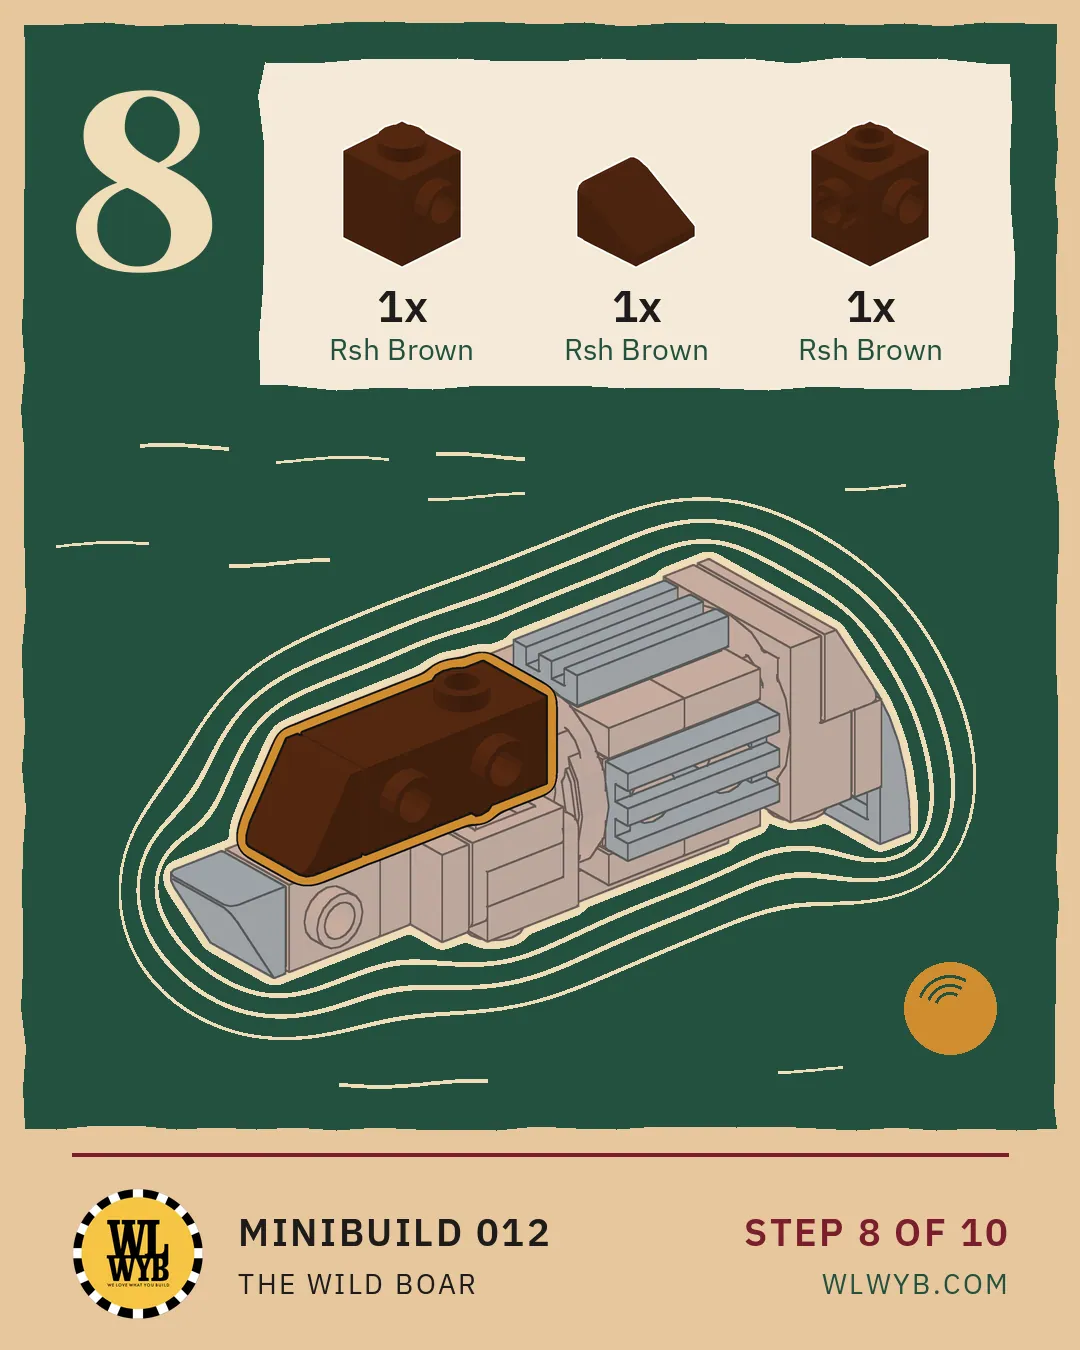
- Step 8 Add the top of the head and the ears. (3 parts)
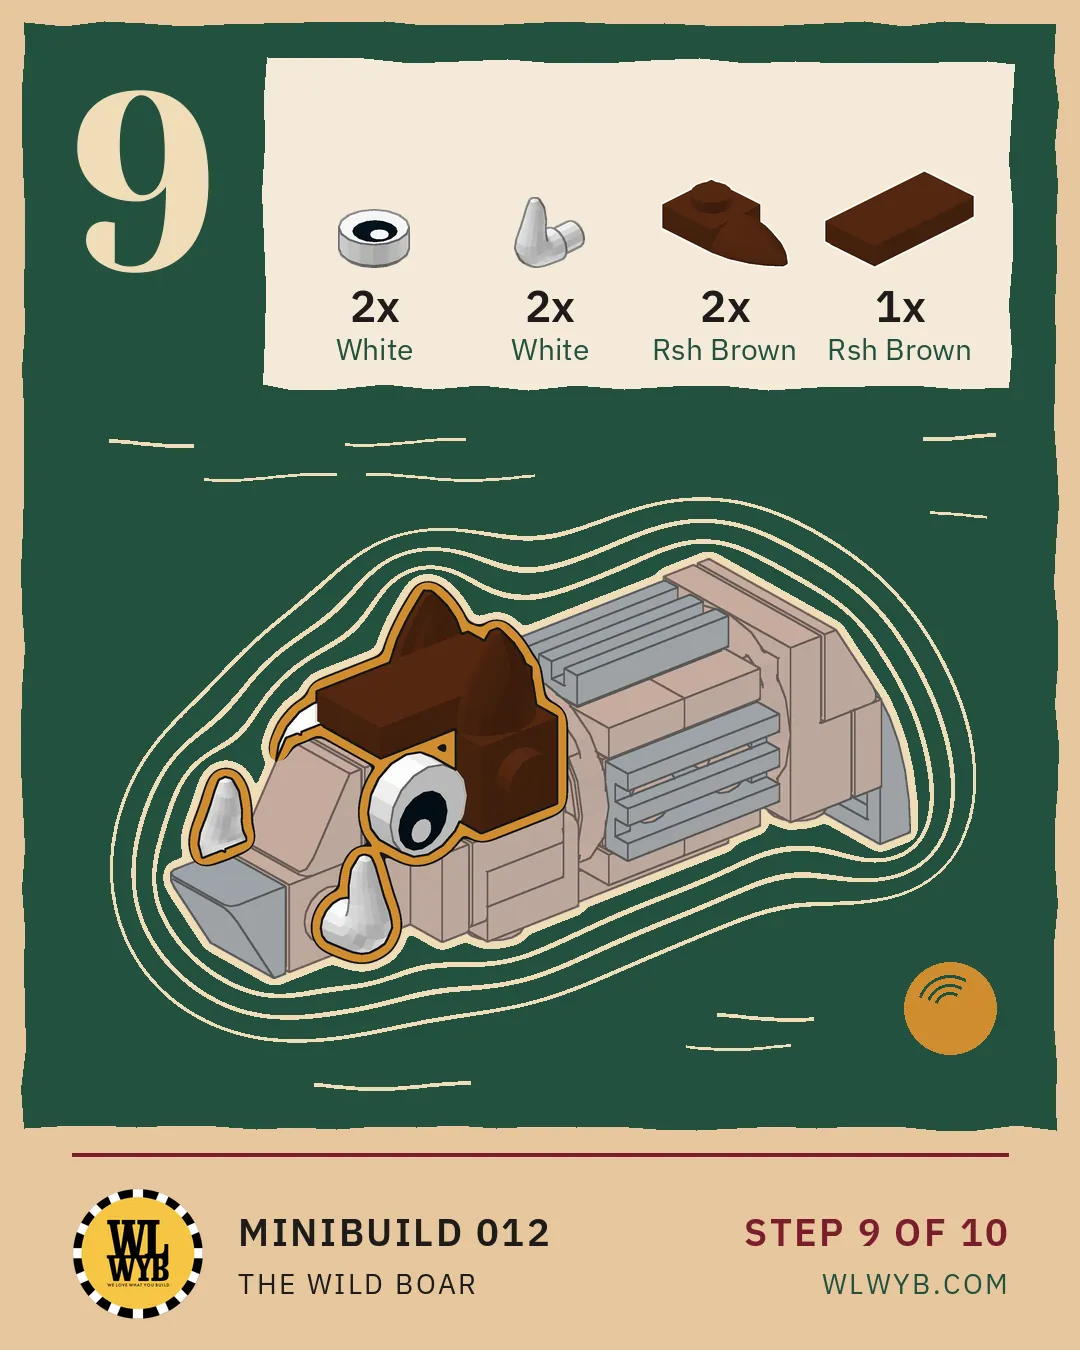
- Step 9 Add the eyes, the white tusks and the tile on the face. (7 parts)
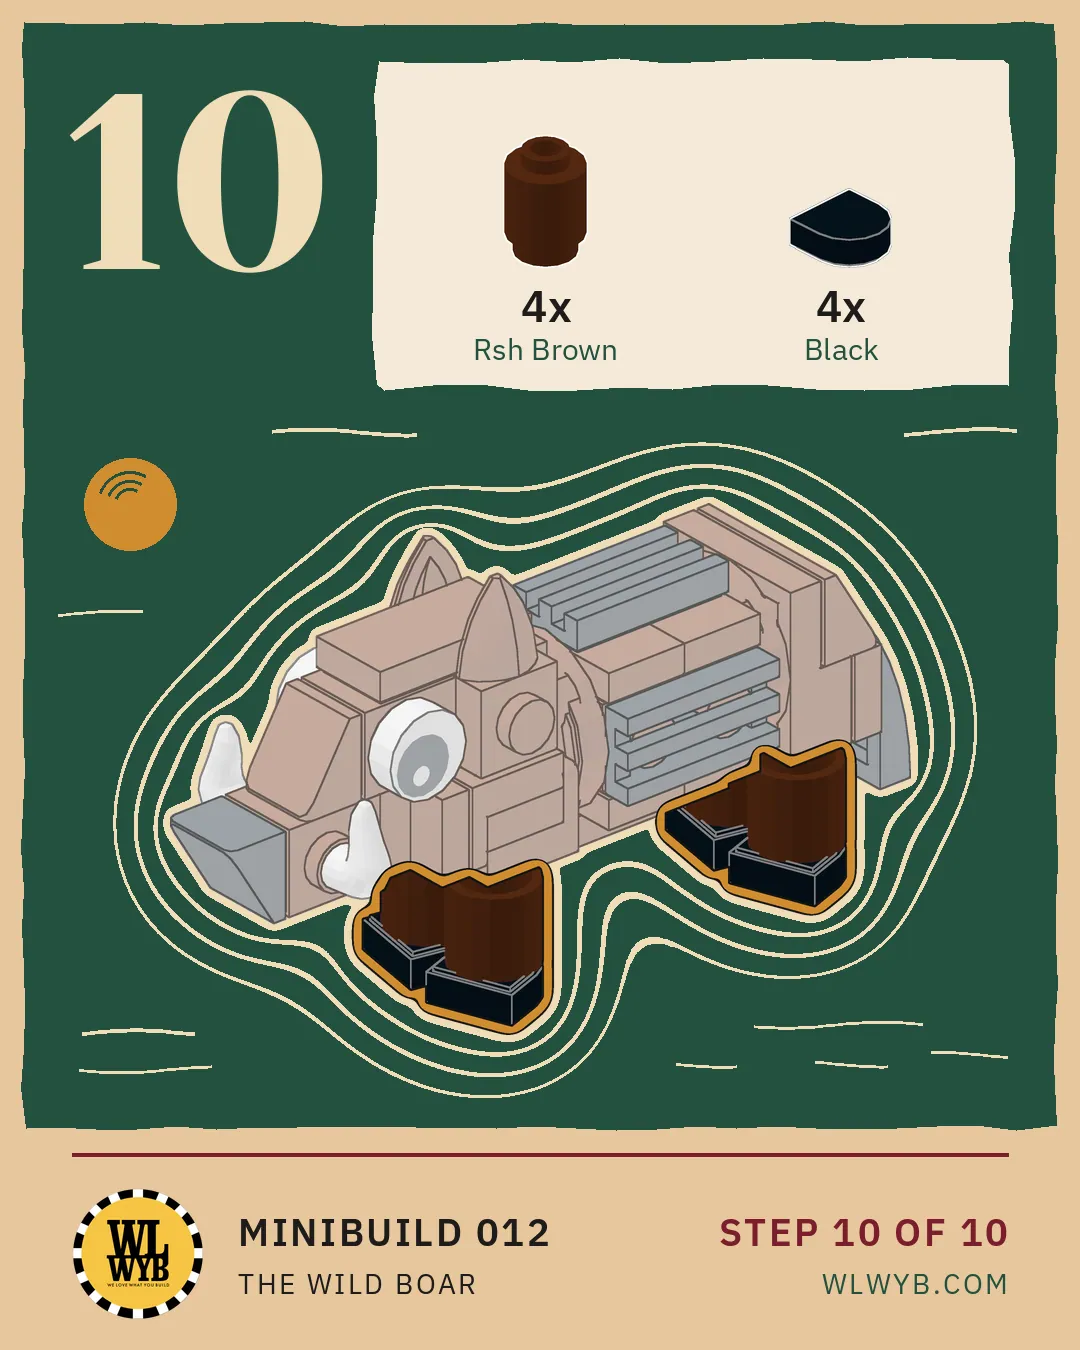
- Step 10 Add the four legs: round bricks with black half circle tiles for the hooves. (8 parts)
The parts list, 44 pieces in total
- 6 x Plate, Modified 1 x 2 with 1 Stud with Groove and Bottom Stud Holder (Jumper), Reddish Brown15573
- 1 x Tile, Round 2 x 2 with Open Stud, Reddish Brown18674
- 3 x Plate 1 x 2, Reddish Brown3023
- 3 x Plate 1 x 1, Reddish Brown3024
- 4 x Brick, Round 1 x 1, Reddish Brown3062
- 2 x Tile 1 x 2, Reddish Brown3069
- 1 x Plate, Round 2 x 2 with Axle Hole, Reddish Brown4032
- 2 x Brick, Modified 1 x 1 with Studs on 4 Sides, Reddish Brown4733
- 2 x Brick, Modified 1 x 1 with Studs on 2 Sides, Opposite, Reddish Brown47905
- 2 x Plate, Modified 1 x 1 with Tooth Horizontal, Reddish Brown49668
- 1 x Slope 30 1 x 1 x 2/3, Reddish Brown54200
- 1 x Slope 30 1 x 2 x 2/3, Reddish Brown85984
- 1 x Plate, Modified 2 x 2 x 2/3 with 2 Studs on Side, Reddish Brown99206
- 1 x Bracket 1 x 2 - 1 x 2 Inverted, Reddish Brown99780
- 1 x Bracket 1 x 2 - 1 x 2, Reddish Brown99781
- 1 x Slope, Curved 2 x 1 x 2/3, Black11477
- 3 x Tile, Modified 1 x 2 Grille with Bottom Groove, Black2412b
- 4 x Tile, Round 1 x 1 Half Circle Extended, Black24246
- 1 x Slope 30 1 x 1 x 2/3, Black54200
- 2 x Cattle Horn, Short, White64847
- 2 x Tile, Round 1 x 1 with Black Eye with Pupil Pattern, White98138pb007
Where to go next
Want a ready-made model? Open Editions has them to order online, with your print on them if you want it. From 20 kits, shipped within 6 weeks.
Want something designed from scratch? Custom Models.