
Ladybug
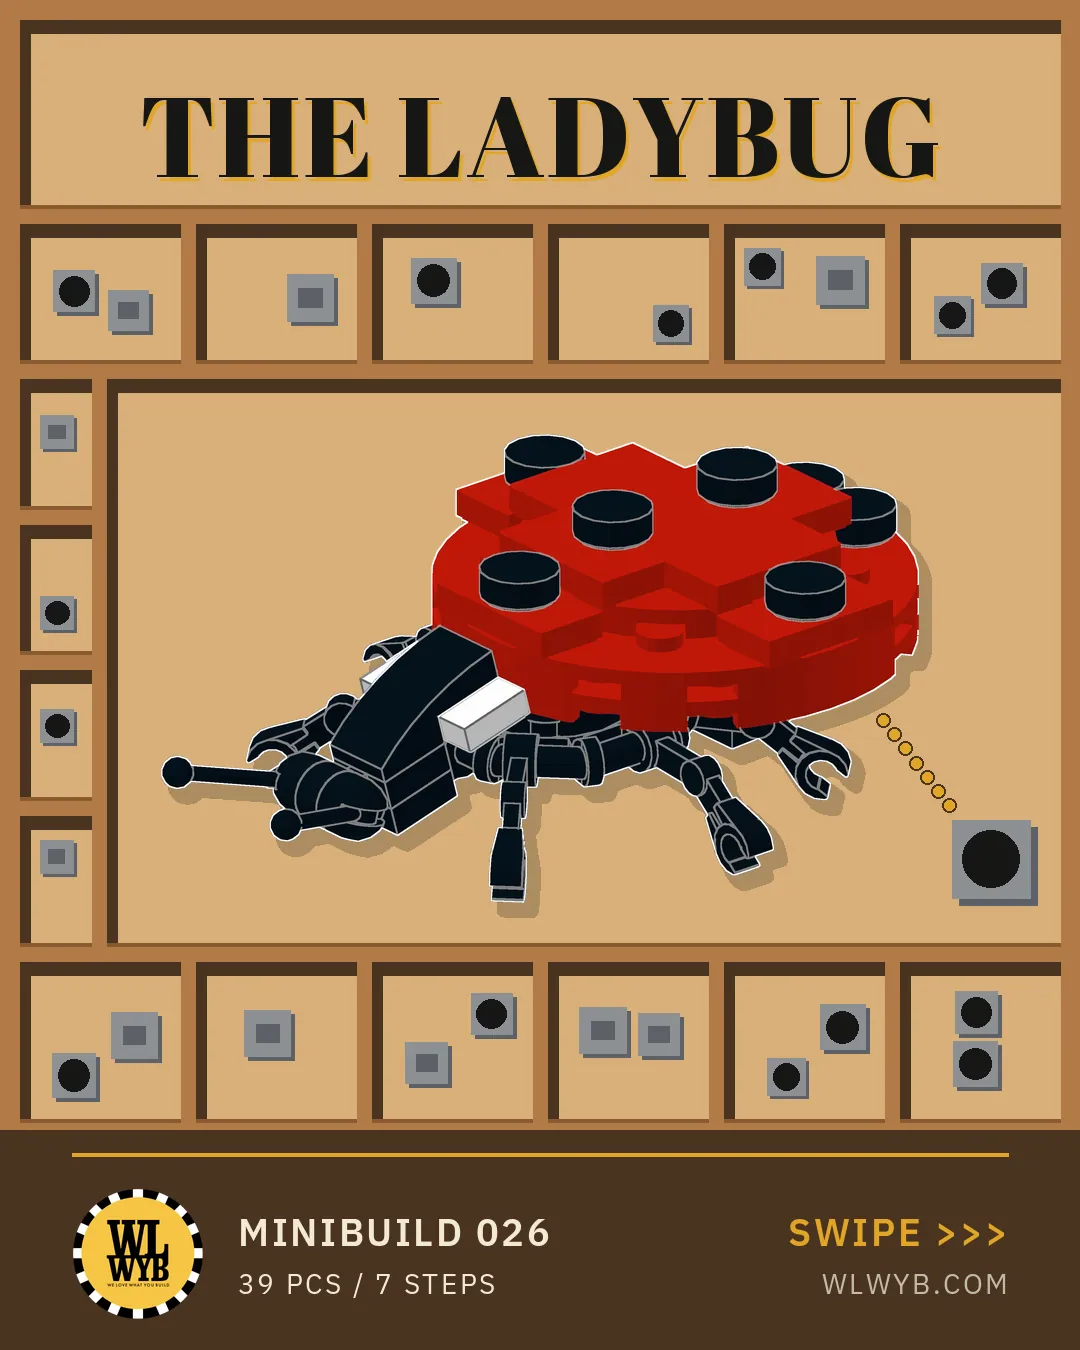
A small ladybug built from LEGO® bricks, red with seven black spots, a black head with two antennas and six legs, in 7 steps and 39 pieces.
Free building instructions for small models built from LEGO® bricks.
Steps
Parts and steps as text
Everything the slides show, in words.
The steps as text
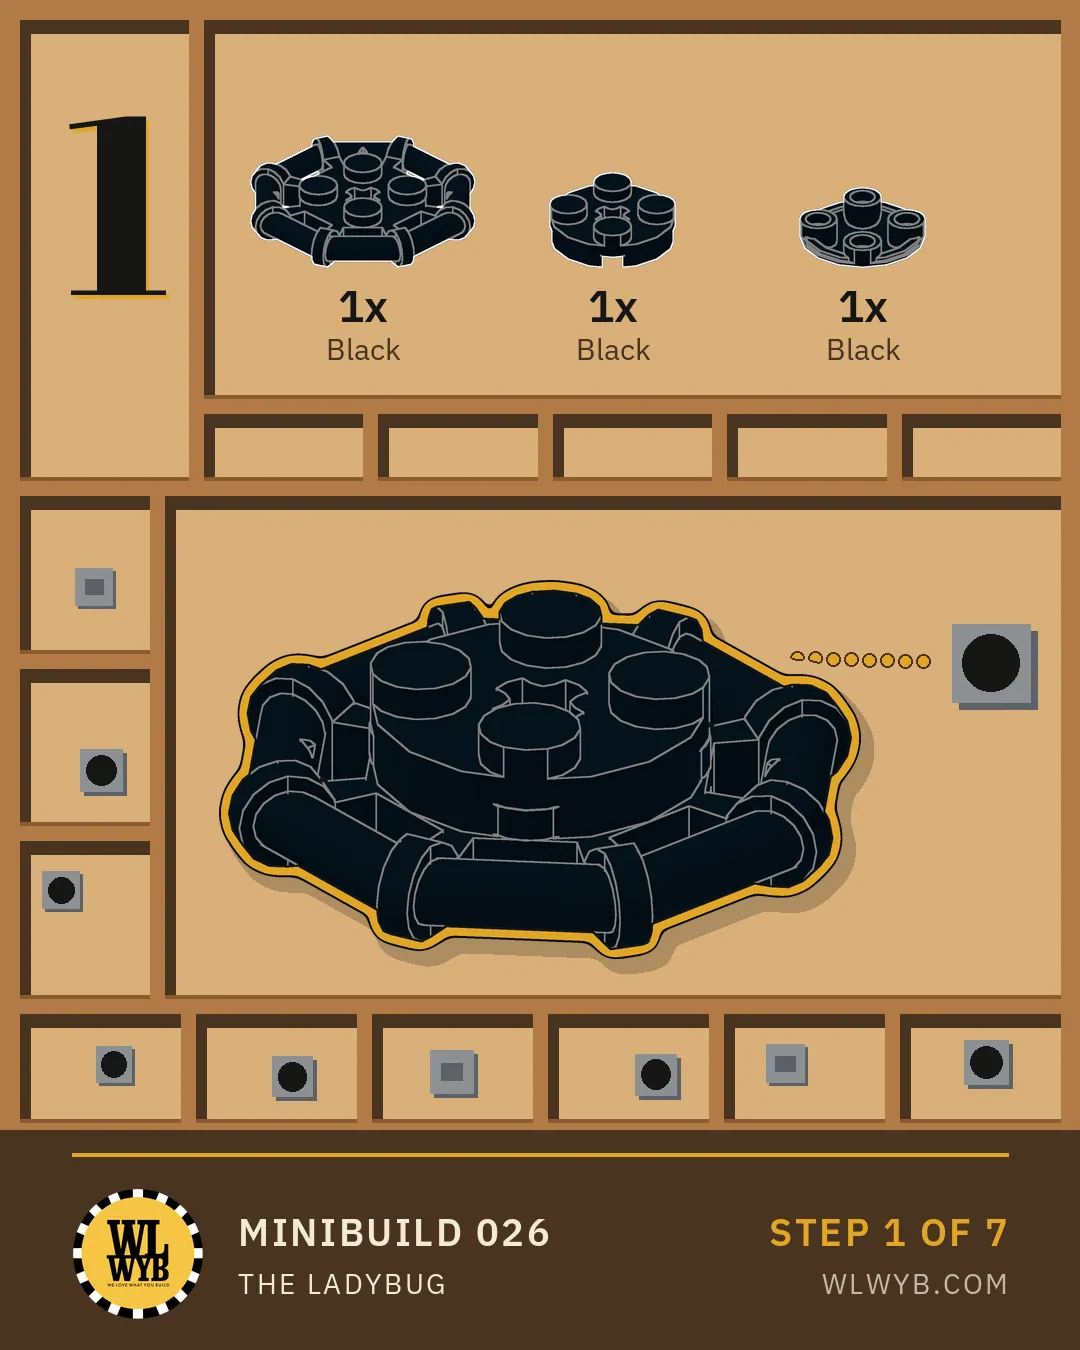
- Step 1 Start with the black octagonal bar frame plate and two round 2 x 2 plates under it. (3 parts)
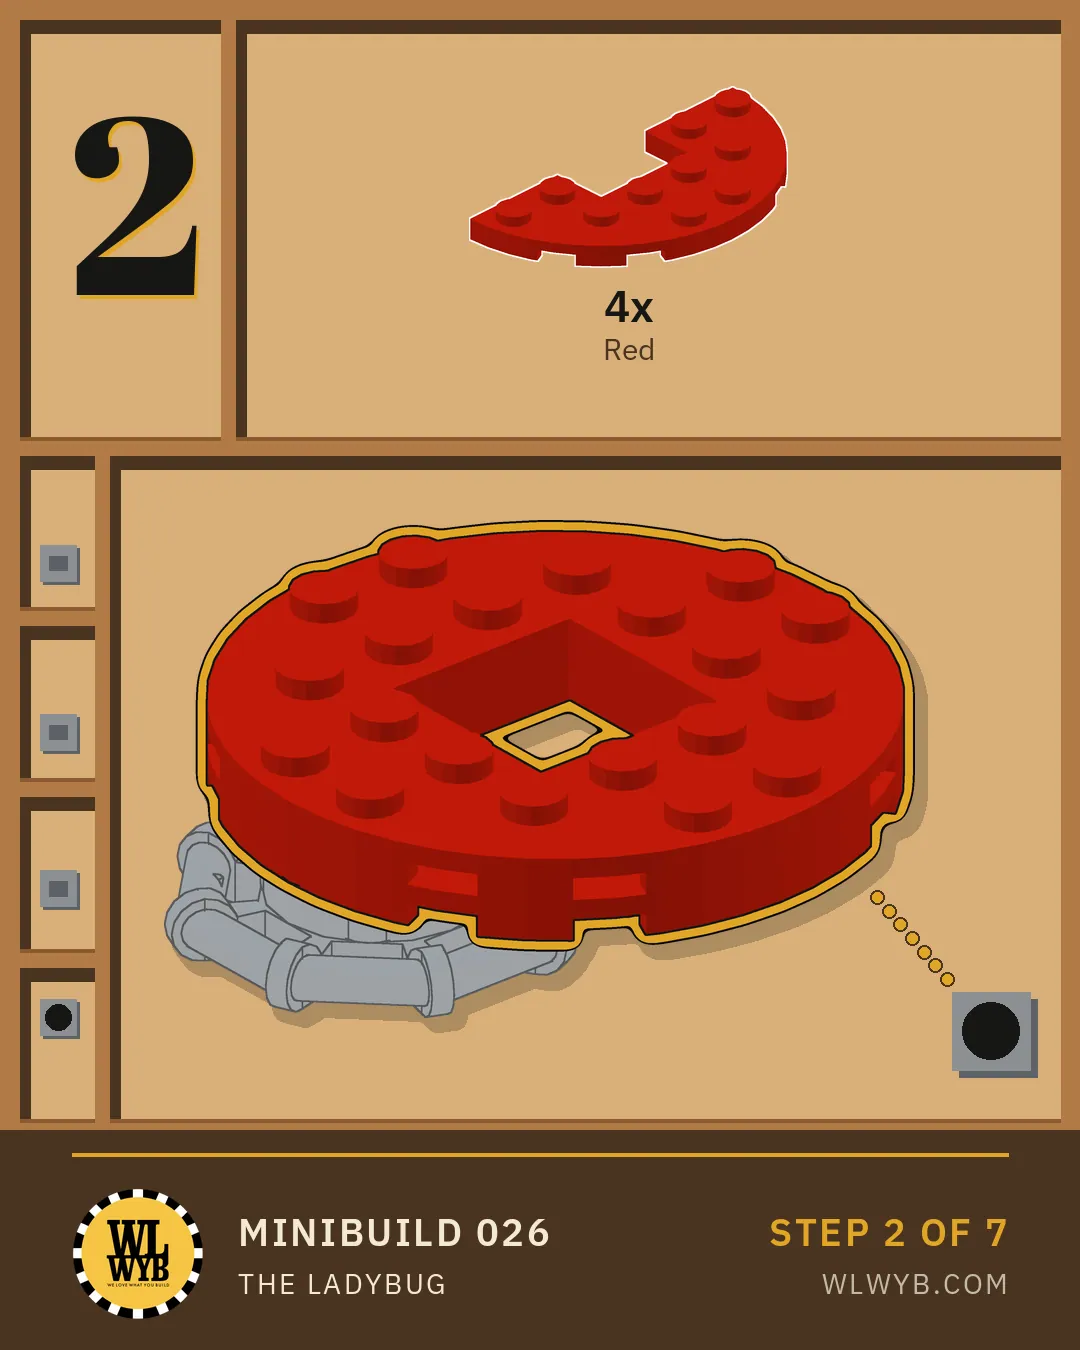
- Step 2 Add the four red half round plates for the wings. (4 parts)
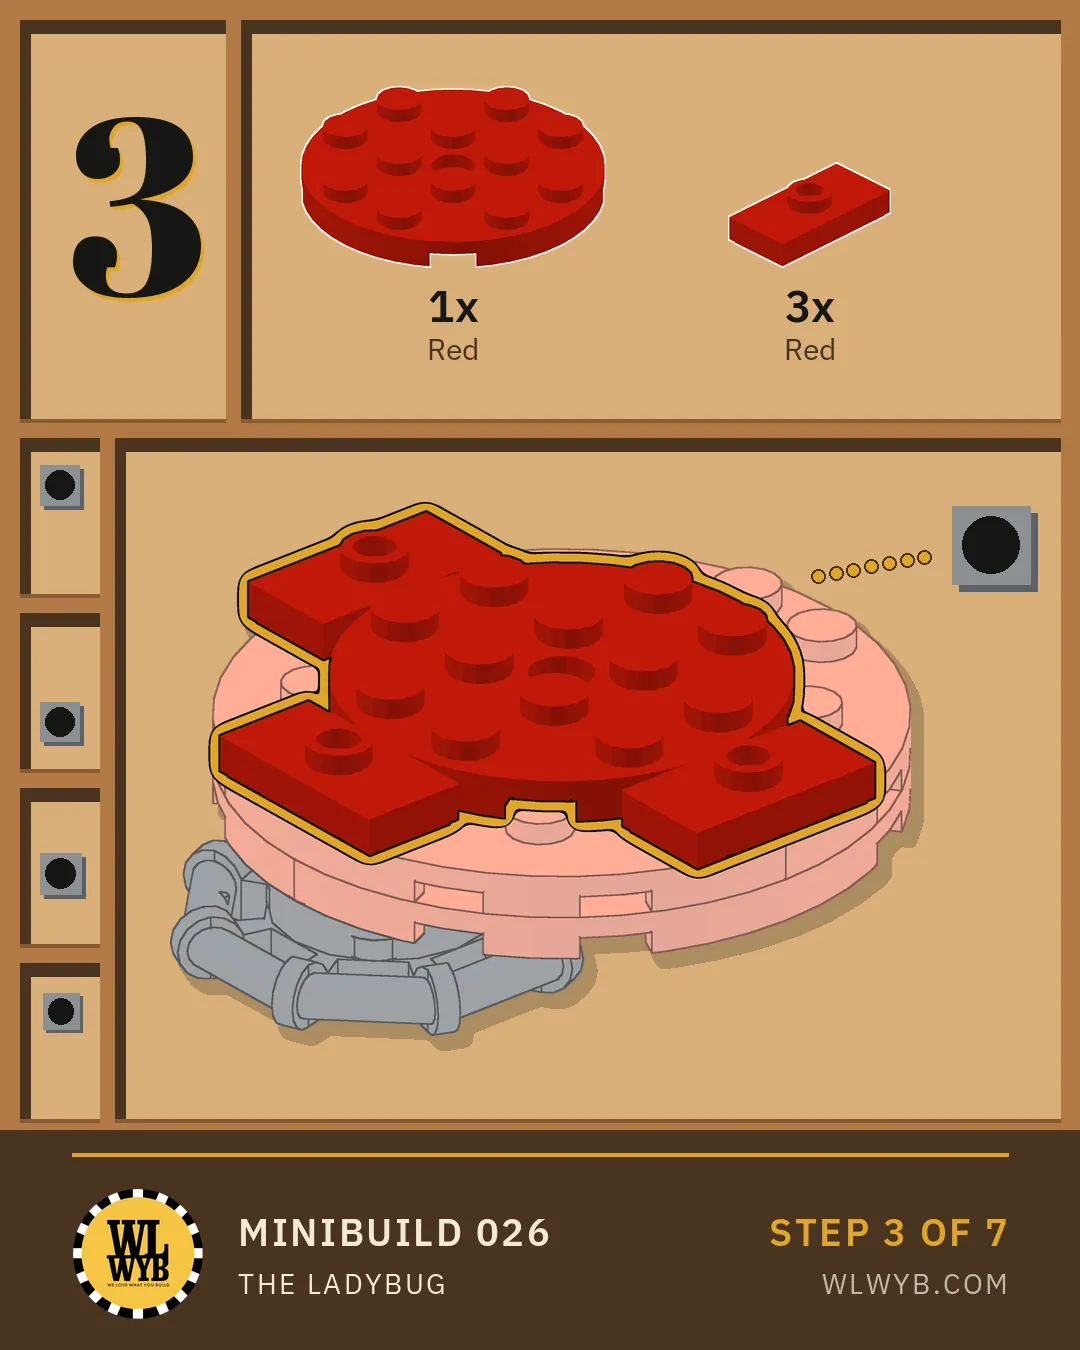
- Step 3 Lock them together with the red round 4 x 4 plate and three red jumper plates. (4 parts)
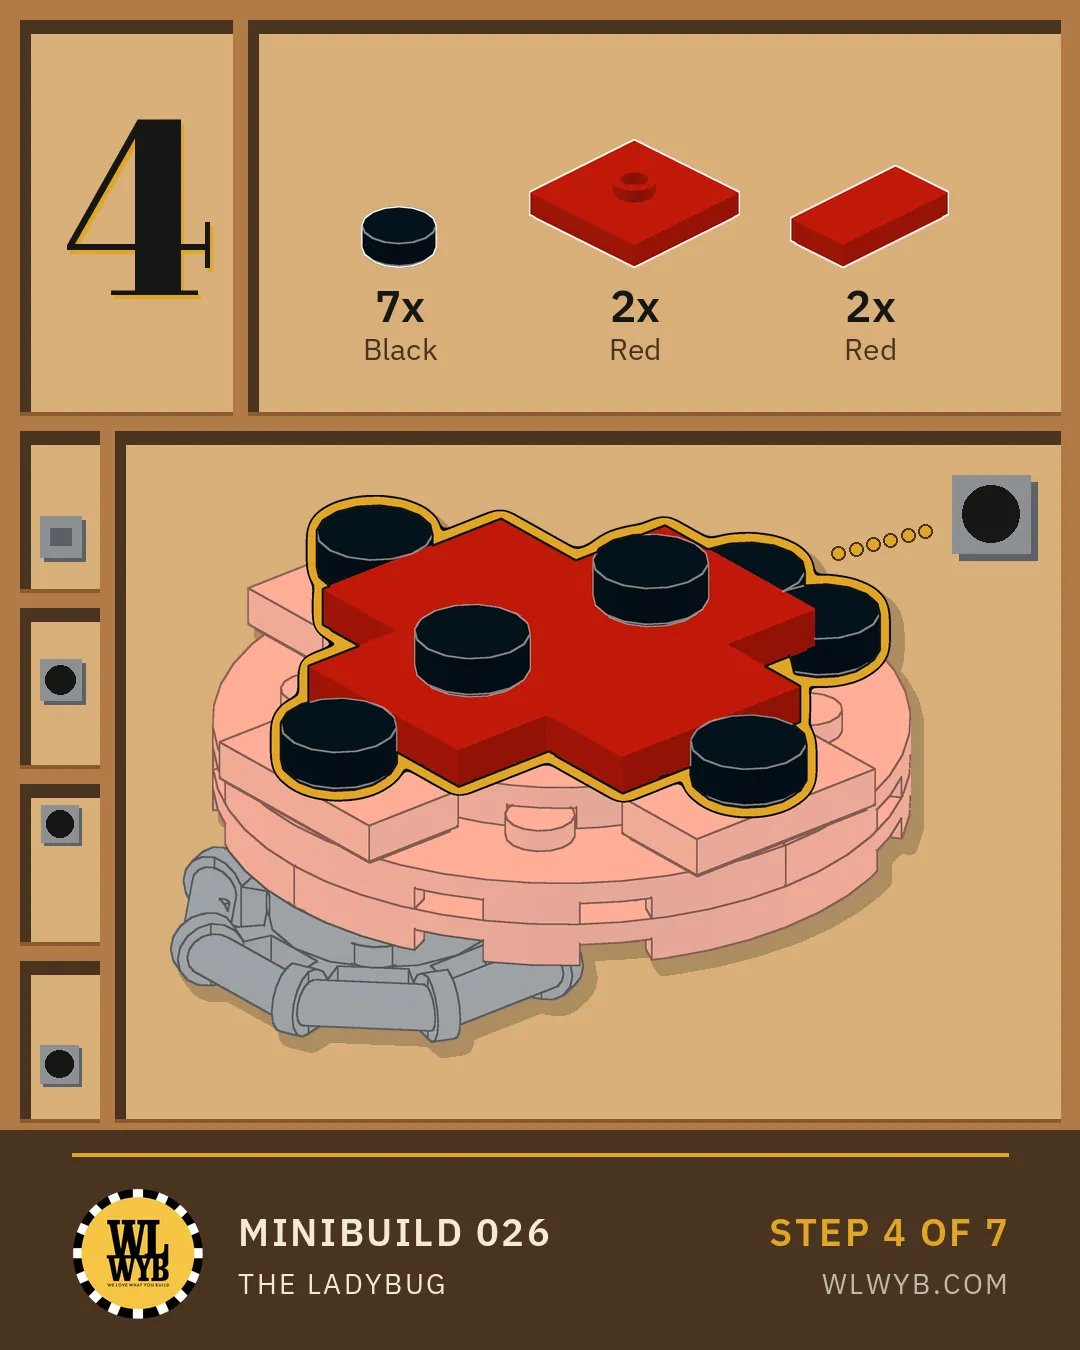
- Step 4 Add the seven black round tiles for the spots, two red jumper plates and two red tiles. (11 parts)
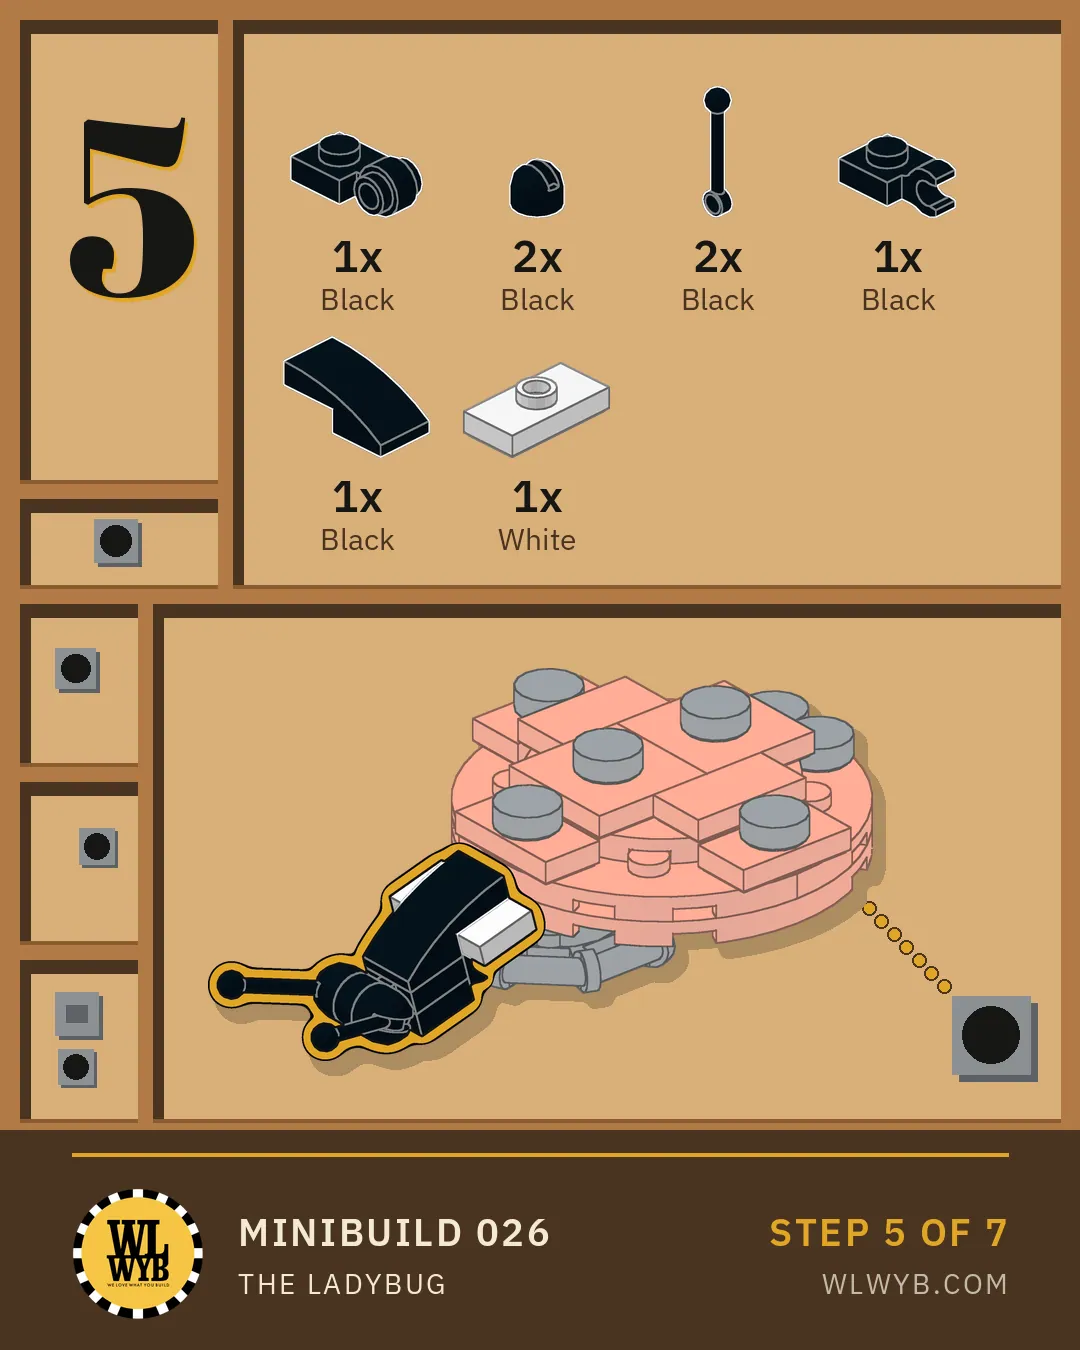
- Step 5 Build the head with the black curved slope, the ring plate, the clip plate, the white jumper plate and two antennas. (8 parts)
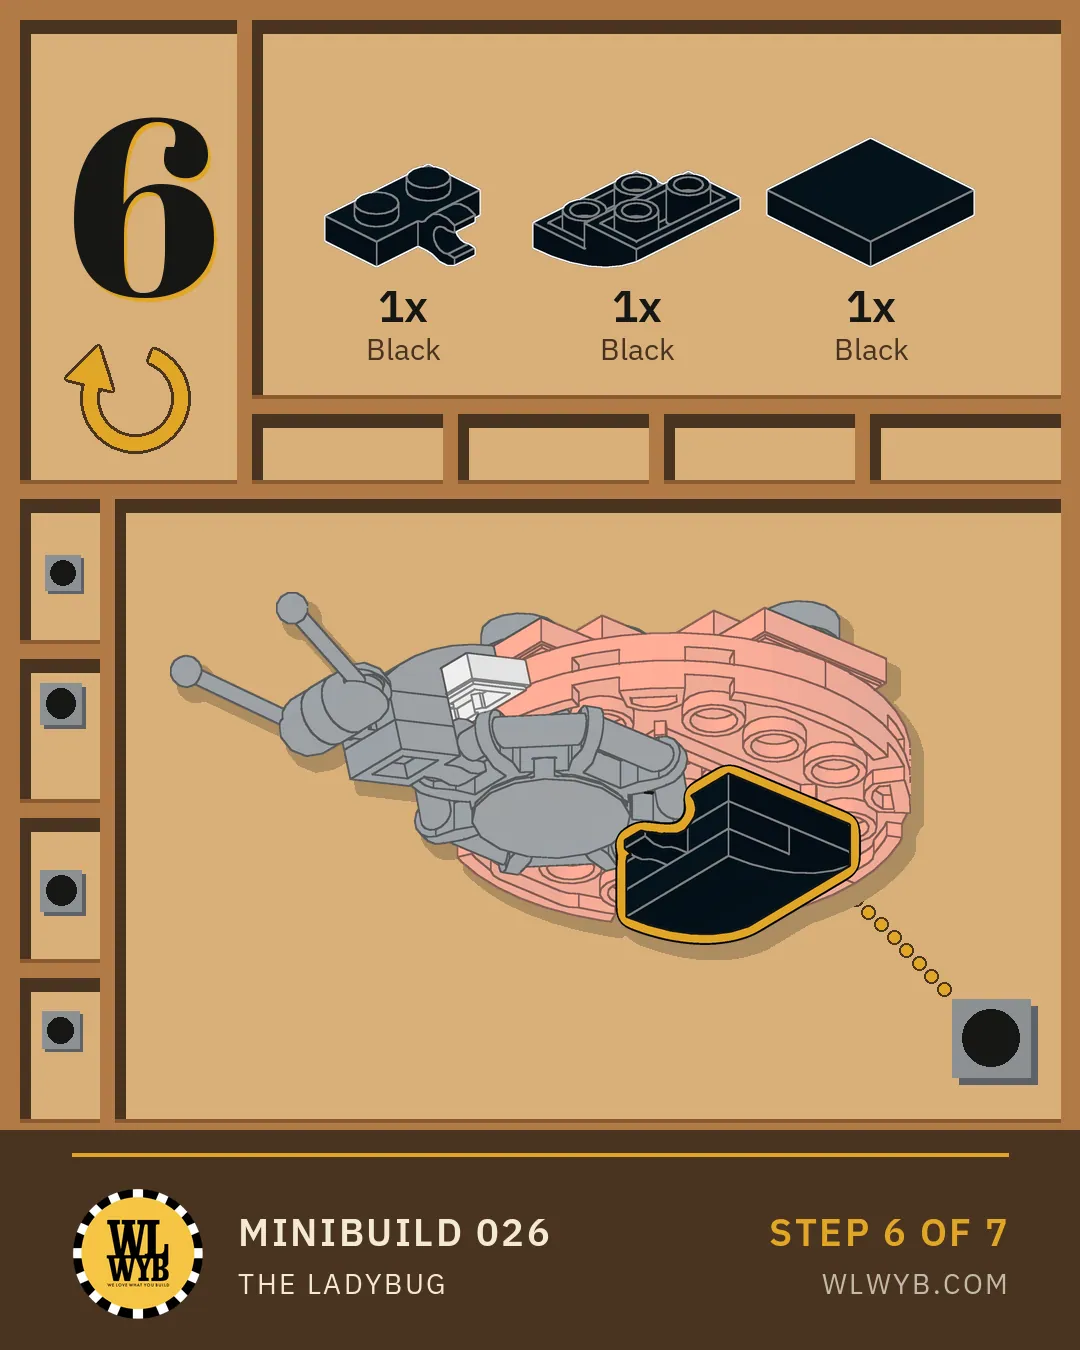
- Step 6 Turn the ladybug over and add the black plate with a clip, the inverted curved slope and the 2 x 2 tile under the back. (3 parts)
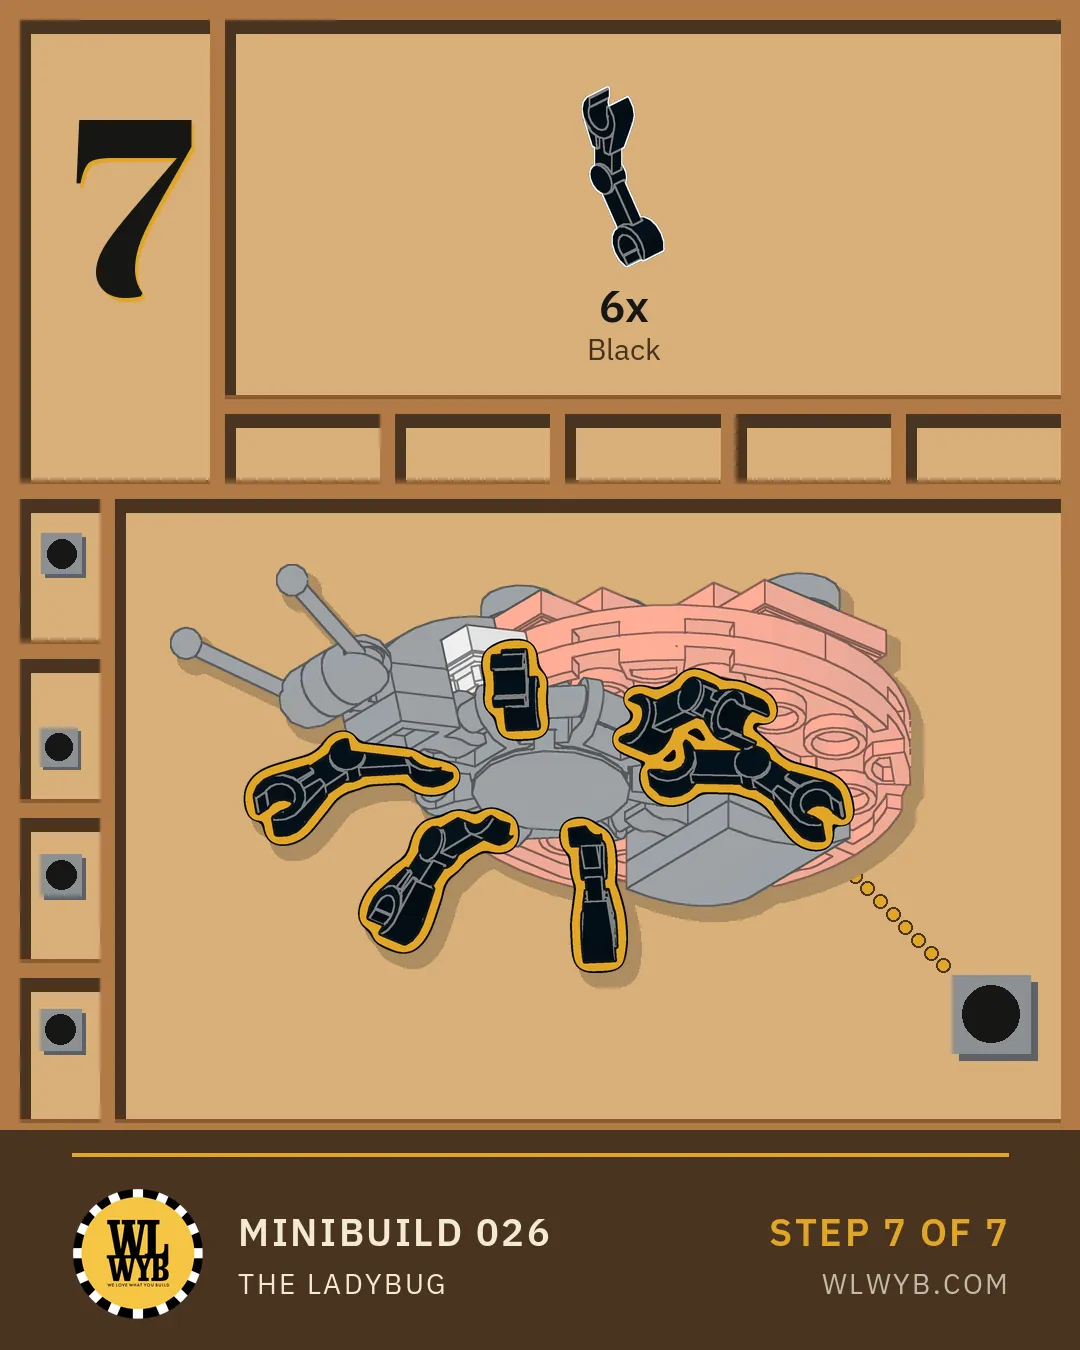
- Step 7 Clip the six black legs on underneath. (6 parts)
The parts list, 39 pieces in total
- 1 x Plate, Modified 1 x 2 with Clip on Side (Horizontal Grip), Black11476
- 1 x Slope, Curved 2 x 1 x 2/3, Black11477
- 1 x Plate, Round 2 x 2 with Rounded Bottom (Boat Stud), Black2654
- 6 x Arm Mechanical, Battle Droid, Black30377
- 1 x Tile 2 x 2 without Groove, Black3068a
- 1 x Slope, Curved 2 x 2 x 2/3 Inverted, Black32803
- 1 x Plate, Round 2 x 2 with Axle Hole, Black4032
- 1 x Plate, Modified 1 x 1 with Light Attachment - Thick Ring, Black4081b
- 2 x Antenna Small Base, Black4592
- 2 x Antenna Small Lever, Black4593
- 1 x Plate, Modified 1 x 1 with Open O Clip (Horizontal Grip), Black61252
- 1 x Plate, Modified 2 x 2 with Bar Frame Octagonal, Reinforced, Completely Round Studs, Black75937
- 7 x Tile, Round 1 x 1, Black98138
- 3 x Plate, Modified 1 x 2 with 1 Stud with Groove and Bottom Stud Holder (Jumper), Red15573
- 4 x Plate, Round Half 3 x 6 with 1 x 2 Cutout, Red18646
- 2 x Tile 1 x 2, Red3069
- 1 x Plate, Round 4 x 4 with Hole, Red60474
- 2 x Plate, Modified 2 x 2 with Groove and 1 Stud in Center (Jumper), Red87580
- 1 x Plate, Modified 1 x 2 with 1 Stud with Groove and Bottom Stud Holder (Jumper), White15573
Where to go next
Want a ready-made model? Open Editions has them to order online, with your print on them if you want it. From 20 kits, shipped within 6 weeks.
Want something designed from scratch? Custom Models.